5th Annual Homemade Ice Pop Recipes

spinach-kiwi ice pop

It's back, my annual home-made ice pop recipe collection. Some may call these homemade popsicles or paletas. Or, frozen smoothies. Whatever you call them they're a delicious summer treat. I want to give a big shout out to Carla, the dietetic student who is volunteering with me for creating these recipes. My directions for her: the recipes need to be simple, include no added sugar, include fruit and even veggies, and only include easy-to-find ingredients. Oh, and of course, that they needed to be delicious. She sure delivered.

The directions for each recipe are the same:

  1. Combine all ingredients in a blender.
  2. Blend until smooth.
  3. Pour into molds.
  4. Freeze.

Enjoy her work!

Kristen

P.S. For more delicious, healthy frozen recipes, check out these links:

Spinach Kiwi

Inspired by: http://www.kiipfit.com/spinach-kiwi-popsicles/

Packed with fruit and leafy greens, the vibrant green color of these popsicles comes from blending both kiwi and spinach.

  • 1/3 cup spinach
  • 1  kiwi
  • 2 drops lemon juice
  • 1/3 cup water

Mango Lassi

mango lassi ice pop

Inspired by: http://revisfoodography.com/2015/04/mango-lassi/

Inspired from a classic Indian cold drink, mango lassi is a blend of yogurt, fruit and spice. Not a fan of cardamom? Simply omit the spice and you can still enjoy it as a mango-yogurt blend.

  • 1 mango
  • 160 ml greek yogurt
  • 1 small pinch cardamom (to taste)

Cantaloupe

cantaloupe ice pop

This very simple and refreshing recipe allows you to use ripe or extra ripe cantaloupes. No added sugar necessary.

  • ¾ cup cantaloupe
  • ¼ cup water

Get more healthy home-made ice pop recipes here:

5th Annual Healthy Home-Made Popsicles (ice pops, paletas)

4th Annual Healthy Home-Made Popsicles (ice pops, paletas)

My Least Popular (But Very Effective) Picky Eater Tip

picky-eater-tip

I’ve been doing workshops for parents on picky eating for 8 years now. At every single picky eater seminar there is one strategy that always causes resistance with the parents in the audience. I continue to share it because it’s a very powerful strategy for minimizing picky eating. Yet I can almost hear the thud it makes when I describe it and it lands on the floor. The problem for which it’s a solution? How to get kids (particularly toddlers and preschoolers) to stay at the table for meals. It’s the solution for meals that go on and on forever because your child sits down, takes one bite, then pops up from the table to do something terribly important, then returns to the table, takes another bite, pops up from the table (and so on and so on).

So, what’s this successful, but unpopular strategy? Create a rule that all meals and snacks are eaten when sitting down. In other words: Stop. Eat. Then Continue On. Yes, I do mean snacks too. You may wonder why I continue to share this strategy knowing that it’ll be so unpopular. I share it because it really is successful for supporting kids to do a good job of eating. If we allow the common practice of letting kids eat snacks “on the run”, i.e. while in the car, in the stroller, you chasing them around the house spooning bite after bite into their mouths, we’re teaching kids that there is an alternative to sitting still at a table to eat. As seen through a toddler’s or preschooler’s eyes:

Why is it that sometimes can I eat while playing. But other times I’m told that I have to stop playing and sit at a table to eat (which is bo-ring).”

Create the expectation that all meals and snacks are eaten sitting down. In families who set this expectation, kids come to the table when called. They eat. Then, they continue on with their day (i.e. go back to playing). Meals and snack go much more smoothly and are less stressful because the kids aren’t constantly getting up from the table.

I understand the initial resistance that you may have to this strategy. In our super busy lives, how are we supposed to carve out time to stop and eat snacks? And it seems like I’m saying that you can never leave the house again, because you always need to be home to give snacks. Not true. Let me clarify.

Does this mean that you never get to leave the house again? No. In the summer this is especially easy. Stop at the park bench, picnic table, or spread out a blanket and enjoy a snack. Use similar ingenuity at indoor locations. For example, you can stop at the bench in the recreation centre foyer or use a table at the food court at the mall.

The important point is to stop. Don’t feed your child in the stroller, car seat, etc. And, don’t hand out a snack while your child continues playing. I know that it’s tempting to do so in our busy lives. But, it sets you up for more battles at meals and snacks. What seems like an efficient use of time in the immediate, actually costs you more time in the long run. In families who establish the stop-to-eat expectation, meals and snacks are very quick. And, they are much more pleasant. When it’s meal and snack time the kids simply get down to the business of eating.

Simply put: Stop. Eat. Then, continue on.

Get more successful picky eater tips. Sign-up for my e-newsletter today.

Where to Start with School-Age Picky Eaters

helping school-age picky eaters

Being known as the picky eater dietitian, people expect that I work with toddlers and preschoolers. It’s true, many, if not most, of the families I work with have 2 – 5 year olds. But I also work with parents of school-age picky eaters. These parents thought that picky eating was just a phase that their kids would grow out of. But now their little ones aren’t so little, and they are still picky. Often what sparks these parents to contact me is their child expresses anxiety about social situations because of the food. They don’t want to go to birthday parties and sleep-overs because they are worried that there won’t be anything for them to eat.

The good news is that we certainly can help these kids to become less picky and more confident with food. The bad news is that change is slower at this age than when working with younger kids.

When working with school-age kids my approach is even more individualized than with toddlers and preschoolers because of their more advanced developmental stage. However, the actions in these family’s plans always start in the same place. If you’ve got a school-age child who didn’t grow out of picky eating, here’s where to start.

Challenge School-Age Picky Eater’s Self-Identity

Ford said (I may be paraphrasing a bit here):

“Whether you believe you can, or you believe you can’t, you’re right”.

These kiddos have a self-identity that they are picky; that they don’t try new foods. Therefore, we need to change their self-belief before they’ll be open to trying new foods. One simple, but powerful way to do this is to change how you speak about your child and food. As a caregiver, you are incredibly important for shaping how a child thinks about him- or herself. Stop calling your child “picky” or “fussy”. Stop saying things about food like “you won’t like this” or “I know that you won’t try that”. Yikes, talk about a self-fulfilling prophesy. Instead, say things that open up the possibility of change. Say things that communicate your belief that they will learn to like new foods. Examples include “you don’t like it yet” or “your taste buds change as you get older. You may want to try it again.”

School-Age Picky Eaters: Provide Opportunities to Try New Foods

You likely stopped serving your child new foods long ago because they never ate them and it seemed futile. However, if kids are never served new foods, how are they going to eat new foods? It’s like saying that you won’t take your child to the pool until they know how to swim. Herein lies the rub. Your child won’t learn to swim unless you take them to the pool, many times, and they take swimming lessons. Learning to like new foods works the same way. Kids need to see them and try them many times before they learn to like them. Now you’ve likely been serving your child a different meal from the rest of the family for many years. Suddenly switching to making one meal for the whole family and expecting your child to eat everything isn’t the answer. A successful, and gentle, first step is to use a strategy that I call the share plate. This means serving at least one food in a meal on a plate or in a bowl in the middle of the table from which everyone can serve themselves. Other terms for this are “family style” or “Chinese style”. Encourage everyone in the family, your fussy eater included, to serve themselves from this plate/ bowl if they wish. An example is to serve some cut-up fruit on a share plate at breakfast. This strategy works because it provides your picky eater with an opportunity to try something new if they choose so. But, it doesn’t force them to try it. It also communicates with your actions what I shared above – that you believe that your child will, one day, join your family in enjoying these foods.

Get more successful picky eater tips. Sign-up for my e-newsletter today.

Don’t Make this #1 Mistake with Picky Eaters

Don’t Make this #1 Mistake with Picky Eaters

The most common mistake with picky eaters that I see parents make is that they stop serving their kids foods that they don’t eat. I understand why parents make this choice. It seems futile to go to the effort of making food only for your child to ignore it. Or, loudly announce that they hate it. Or, melt down from just seeing it on their plate. It seems like a waste of your precious time, a waste of food, a waste of money, never mind the heartbreaking feeling that your child is rejecting you. However, stopping serving the dreaded vegetables/ meat /[insert the foods your child doesn’t eat] is the wrong way to go.

I like to give non-food analogies because food is such an emotional issue that it can be hard to see what’s going on. So here’s my non-food analogy for kids and challenging foods:

Deciding that you’ll serve your child vegetables [insert the foods your child doesn’t eat] once they like them is like deciding that you’ll take your child to the pool once they know how to swim. Of course, you need to take your child to the pool so that they can learn how to swim. They aren’t going to suddenly wake up one morning knowing how to swim.

The same goes for foods your child doesn’t like. They won’t learn to like them if they never see them. Research shows that kids need to try foods somewhere between 10 – 30 times before they learn to like them. That doesn’t count the number of times that a child needs to see a food before they’re willing to try it. Of course each child and each food is going to vary in the magical number of times. I just learned to like Brussels sprouts last year and trust me, I’ve tried them way more than 30 times.

A study showed that parents usually give up after trying 5 times. So you haven’t even made it to the minimum number of presentations never mind the top end of the average range.

So what’s the solution? Plan meals that include both safe foods and challenging foods. One meal for the whole family that includes at least one safe food for your child. Yes, if you have more than one child you will need to include safe foods for each of them. What should the challenging foods be? Foods that you eat in your family. This way you aren’t making separate foods just for your child, which, when they aren’t eaten, feels like that waste of time. You’re cooking food that you’ll eat. If the kids don’t eat it – then more leftovers for you! No wasted time, food, or money.

The powerful word in this situation is “yet”.

Your kids don’t like it yet.

Serving a food again and again is how they learn to like it. Just like how a child who is starting swimming lessons doesn’t know how to swim yet.

Keep up with the practice and trust that your child will get there.

Get successful strategies for picky eaters. Sign-up for my e-newsletter.

What’s the Right Age to Start Solid Foods?

age-to-start-solid-foods

Parents have been sending me a lot of questions lately asking what is the right age to start introducing their baby to solid foods. They’ve heard 6 months before. Now they’re hearing 4 months from other health professionals. And, some places online say 4 – 6 months. They’re right to be confused with all this conflicting information. If you’re wondering what age to start your baby on sold foods, here’s the scoop…

The recommendations haven’t changed. The World Health Organization recommends 6 months¹. In Canada the recommendations from Health Canada, the Canadian Pediatric Society, Dietitians of Canada and the Breastfeeding Committee for Canada say 6 months². The American Academy of Pediatrics recommends “around 6 months”³.

I suspect that reports from a new, and important, study on preventing peanut allergy are behind the advice that these health professionals are giving parents. Now I’m not in the doctor’s office when the parents are being given this advice, so this is a best guess. But the study is being talked about a lot in the health provider community, which is why I’m suspecting it’s behind the advice that parents are receiving. Unfortunately the researchers chose to use a phrase that I’m suspecting is creating some of this confusion.

The research study found a significant decrease in peanut allergy with their intervention⁴. What was their intervention? To introduce, and regularly feed, peanuts to children starting as babies versus waiting until they were 5 years old. Giving peanuts to the babies reduced the incidence of peanut allergy. But here’s where I suspect the misunderstanding comes in. The children in the “early” introduction of peanuts group were between 4 – 11 months old. Because this is “early” versus introducing peanuts at 5 years old. The article doesn’t compare introducing peanuts at 4 months versus 6 months. However, I suspect that busy health professionals could have glanced at articles describing the study and mistakenly concluded that the “early” group meant introducing peanuts at 4 months versus 6 months of age. Especially, since the researchers didn’t report the older children’s age as 5 years, but as 60 months.

The reality is that the scientific and health communities still don’t know anything definitive about the perfect age to introduce solid foods to minimize food allergy.

What we do know is that babies start to run low on the iron that they’ve stored in their bodies at approximately 6 months of age. And so it’s at this time that we need to start introducing iron from a new source, i.e. solid foods. Iron is important for brain development in babies and young children.

And, babies show the signs of being ready to start solid foods between 4 – 6 months. Just like every other developmental stage, babies arrive here at slightly different ages. The signs of readiness for eating solid foods are:

  • The disappearance of the extrusion reflex.

  • The ability to sit up (with support) and hold their own head up (without support).

  • Can visually track your movement.

  • Becoming fascinated with watching people eating.

As we learn more about what causes food allergies and how to prevent them, the recommendations may change. There are some fantastic studies underway that I can’t wait to get the results from. Until we know more, I still recommend starting solid foods at about 6 months. If your little one is between 4 – 6 months, you’re seeing all the signs of readiness, and you’re keen to start – go ahead. If you enjoy the simplicity of breast or bottle feeding or you’re not yet seeing the signs of readiness in your child, hold off until 6 months of age. My advice for the last 7 years has been “start solids at about 6 months”. I’m not changing my advice yet.

References:

  1. http://www.who.int/nutrition/topics/complementary_feeding/en/

  2. http://healthycanadians.gc.ca/healthy-living-vie-saine/infant-care-soins-bebe/nutrition-alimentation-eng.php?_ga=1.150740528.74375254.1447739252

  3. https://www.aap.org/en-us/advocacy-and-policy/aap-health-initiatives/HALF-Implementation-Guide/Age-Specific-Content/Pages/Infant-Food-and-Feeding.aspx

  4. http://www.leapstudy.co.uk

Spitting Out is OKAY

spitting out is okay picky eater

While it may be considered poor table manners (and perhaps somewhat gross) to spit food back out, it’s actually a good strategy for helping picky eaters gain the confidence to try new foods. Yes, spitting out is okay.

For toddlers and preschoolers, trying a new food is scary. One way to make it less scary is to know that if you do choose to put something in your mouth, and it doesn’t taste good (or has a “yucky” texture), you can spit it back out.

For some picky eaters, “tasting” the food by touching it to their outstretched tongue is even less intimidating than putting the food in their mouths. This too is okay. Because it’s them taking steps towards trying the new food.

Now just because you allow food to be spit back out, doesn’t mean that you need to allow the drama that often goes along with it – the loud exclamation of “yucky!” and over-exaggerated action of spitting the food back out (perhaps accompanied by the classic wiping of the tongue to get rid of the “disgusting” taste).

Even young children can be taught how to politely take food out of their mouths without the fanfare. And, as they get a little bit older, you can teach them how to subtly spit the food into their napkin.

Bottom Line: Spitting food back out is okay. Making a big fuss about it isn’t.

Get more successful tips for picky eaters, sign-up now for my e-newsletter.

Be Careful What You Say to Picky Eaters

careful what you say to picky eaters

You need to be careful when it comes to talking with picky eaters, toddlers and preschoolers, about food. Words are powerful. What you say can help kids open up to trying new foods. Or, it can backfire and make them more resistant to trying new foods. So what are the right and wrong things to say? It’s likely not what you think.

Right Things to Say to Picky Eaters:

Do use creative marketing. There’s nothing like an unfamiliar word to make a kid say “I hate it!” before they even try a food. On the other hand, kids respond both to fun names and descriptive terms. Use their extremely keen observation skills to your advantage by using familiar and descriptive terms. For example, broccoli can be “little trees”. Name a dish after your child’s favourite superhero.

Here’s a great example that a friend of mine shared with me recently. Her son is 4. A couple of months ago she announced that dinner was lasagna. She hadn’t served her son lasagna before so he responded with the classic “Yuck, I want something else.” As a friend of mine, she knows better than to believe him and make something different. Instead, she put a piece on his plate and while he was watching she said “see, it’s pasta cake” and separated it into it’s different layers. Her son knows what pasta is. And, he definitely knows what cake is. Sure enough, once he saw that “lasagna” was something that he recognized, he happily ate it. So far, her son won’t eat lasagna. But he happily eats “pasta cake”. As he matures, he’ll become comfortable with the word “lasagna”. Until then she’ll happily include “pasta cake” in the family meal repertoire.

Wrong Things to Say to Picky Eaters:

Don’t talk about the nutritional benefits of a food. Most parents I work with and who attend my workshops unfortunately get this one wrong. Of course you care about healthy eating. You think about it when you choose what foods to serve. But don’t talk about it with your child. Studies show that if kids are taught about how healthy a food is, they are less likely to try it. And, if they do try it, they rate the taste as yuckier than if nothing was said. So, as tempting to talk about how the broccoli will make your child grow big and strong, make the effort to zip it. In this case, your actions speak louder than words. By serving broccoli, and eating it yourself, you are teaching your child that they should eat broccoli. No words are needed.

Don’t call multiple dishes by the same term. Toddlers and preschoolers are not yet able to classify things. It’s just not where they are at developmentally. Sure, we adults can use the term “fish” to mean salmon and halibut and tuna. While these foods all have very different tastes and textures, we adults can use one word “fish” to refer to them all. The developmental stage for toddlers and preschoolers means that they use a word to refer to one very specific thing. Very specific. If you use the word “fish” to mean “halibut” then that’s what they expect. If you then say “we’re having fish” and serve them salmon, they’ll freak out. Because you lied. The food in front of them is something very different than halibut – that’s obvious to see. And their natural reaction is to not want to try it. Instead, use the technique that I shared above. If you’ve always called halibut “fish” and you want to serve salmon, call it “pink fish”.

Book an information call today to find out how I can help with your child’s nutrition.

Stress During Meals Will Cause Picky Eating

stress during meals

There’s a common reason behind several of the techniques that I teach to prevent (and turn-around) picky eating with kids. It’s stress. If your child experiences stress during meals they will honestly lose their appetite. And it’s not all in their heads. There’s a physiological cause to their lost appetite. As such, if you want your child to eat well (and what parent doesn’t), you want to minimize the amount of stress that your child experiences while at the table.

Stress During Meals

Here’s how stress causes people to lose their appetite. I imagine that you’ve heard of ‘fight or flight’. It’s the signals that travel through our body when we’re scared/stressed. You’ve likely heard that adrenaline is involved. One of the many results of these messages is that the body moves the blood flow away from our digestive tract towards our muscles in our arms and legs. It’s preparing us to be able to fight or run away from that saber-tooth tiger that’s chasing after us. The body only has so much blood so it prioritizes saving our life from the imminent threat – not having lots of blood ready to absorb nutrients that we’ve eaten and digested. Because, we’re highly unlikely to eat a meal with that sabre-tooth tiger. We can eat later once we’ve found safety.

Unfortunately our bodies can’t tell the difference between a physical threat (like that tiger) and psychological stress. It creates the same reaction. So, when your child experiences stress or anxiety at the table, they honestly lose their appetite.

Now does this mean that you never serve your child a new food ever again? No. Nor does it mean that you need to go to great lengths to entertain your child at the table. I actually recommend no screens or toys at the table. Afterall, the opposite of ‘stress’ isn’t ‘entertained’. It’s ‘pleasant’ or ‘calm’.

Stress-Free Meals with Kids

Here are some strategies to create a stress-free meal environment for your child:

  • Be good company. Talk about your days, play eye spy, any pleasant conversation topic.

  • Don’t choose mealtime to be the time to scold or punish kids. Or, argue with your spouse.

  • Always serve at least one familiar food at a meal. This way your child can rest assured that even if they don’t like the other foods on the table, they can fill themselves up with their familiar food.

  • Don’t stress the mess. Kids gradually learn to use utensils. Don’t expect them to be proficient until they reach school-age. Allow toddlers and preschoolers (and younger school-age kids too) to use a mix of fingers and utensils. Constant nagging about utensils and manners can create anxiety.

  • Don’t have a one-bite rule. Now before I get a slew of responses from people who swear that it works, I agree that the one-bite rule (also called the “no thank you bite” or “polite bite”) can work with some kids without causing any stress. Some kids are just wired so that trying new foods doesn’t stress them out. For lots and lots of kids however, making them try a food before they’re ready (or even the anticipation that you’ll ask them to try a new food) can cause the stress reaction in their bodies before they even sit down at the table. The result is that they’ve lost their appetite before the meal has begun.

Get Expert help with your child’s eating. Book an information call today.

Will Kids Starve Themselves?

will-kids-starve-themselves

Some sayings are true. Some aren’t. You’ve likely heard people say “kids won’t starve themselves”. I hear it all the time. And, I rarely read an online conversation about picky eaters where someone doesn’t say this. Unfortunately this is one of those sayings that just isn’t true.

Will Kids Starve Themselves? Yes, Sometimes.

For some picky eaters, mealtimes have become very stressful. They’re left between the two choices of 1) being hungry or 2) facing the stressful meal situation. Some kids choose to go hungry. Yes, in other words, they starve themselves.

These kids either aren’t eating enough foods and their growth starts to falter. Or, they eat such a narrow variety that they aren’t getting the nutrients they need (even if they’re getting lots of calories).

Now the answer to the problem is not to force kids to eat more. Let me repeat that very loud and clear: THE SOLUTION IS NOT TO FORCE KIDS TO EAT MORE. More often than not that approach just increases kids’ stress, causing them to eat less.

Stress

What causes this stress? There can be many causes. That’s why I do a full assessment when working with families, because it’s important to identify and address the root cause. Some kids are sensitive souls who need to approach new foods gradually. Some kids are at a boundary-pushing stage and choose to engage parents in a battle of wills. Some kids miss out on learning specific chewing skills and find a variety of foods difficult to eat. Some kids have texture sensitivity and find certain food textures unappealing. I could go on listing causes.

I want to be really transparent here. I went back and forth many times about whether or not to write this article. I don’t write this to cause you more panic. The last thing that I want to do is cause more mommy guilt because guilt and shame get in the way of making change. I’m writing this because I do see kids who are starving themselves. So I feel the need to address the myth that’s spouted so very, very often by well-meaning advice givers.

Will Kids Grow Out of Picky Eating?

I also write this because I see so many families who could use my services. But they don’t seek help because they think that their child will “grow out of” their picky eating and that “kids won’t starve themselves”.

Lastly I write this because sometimes I see clients whose child is 7, 8, 9, or 10 years old and who is still a picky eater. Creating change for these kids is really, really hard (and progress is painstakingly slow). I wish so much that I could turn back the clock and work with these families when their kids are 2 and 3 years old. Not only could we prevent years of poor nutrition and stress for the child, we could have alleviated stress for the whole family. Because the whole family is affected when feeding isn’t going well with one child.

What’s important is that if feeding isn’t going well, you look for a solution to the problem. Don’t believe this myth that kids won’t starve themselves.

Check out my book where I share my simple-step-by-step solution for picky eaters (2-5 years old).

Nutrition Game Changer: Eating Protein at Afternoon Snack

protein at afternoon snack

Something that I recommend for almost all of the women whom I’ve worked with is eating protein at afternoon snack. Why is this a nutrition game changer? Because in my experience, it helps with a lot of the problems that women come to me for help with regarding their eating in the afternoon and evening. Do any of these scenarios sound familiar?

  • Cravings for junk food in the late afternoon.
  • Energy crashing at about 4pm.
  • Constant nibbling while you’re cooking.
  • Getting too hungry to last until you can actually make dinner so instead you pick up take out/ go through a drive-through/ eat out.

If so, then eating protein at an afternoon snack is worth trying. Here’s why:

Human beings digest a meal and get hungry again in about 4 hours. As our blood sugar drops, our body sends signals to us that we’re hungry. If we don’t respond by eating something that subsequently raises our blood sugar, our bodies send more and more urgent messages. Messages that drive us towards the high sugar, fat, salt, very tasty foods. It’s what the feeling of ‘hangry’ is all about.

Assuming that you’ve eaten lunch at about noon, it’s natural that you start to feel hungry again at about 4pm. The food choices that you make at lunch will impact how long you last before you start to get hungry. Some choices will mean that you will feel hungry again in less than 4 hours. But that’s the topic of a whole different blog post J

The longer that you wait until you eat again, the more your body will drive you towards those high sugar, fat, salt, very tasty foods. It’s a physiological drive, not a lack of will power, that causes you to eat those foods before dinner.

The secret to making healthy food choices in the afternoon and evening is to prevent ‘hangry’ by having an afternoon snack. Including protein at your afternoon snack can help your body digest your snack more slowly, thus causing more even blood sugar and fewer cravings for junk foods.

Pair your protein food with some veggies and/or fruits for a perfect combination of nutrients. Examples include:

  • A piece of fruit and a small handful of nuts.
  • Raw veggies with white bean dip.
  • Chia coconut pudding topped with fruit.
  • Collard leaf wrapped around sliced hard boiled egg and bell peppers.
  • Plain Greek yogurt topped with fresh or dried fruit.
  • Apple slices or a banana dipped in nut butter (e.g. peanut butter, almond butter).
  • Protein powder smoothie made with fresh or frozen fruit and leafy greens (e.g. spinach).

Eat protein at your afternoon snack. It’s a nutrition game changer for preventing craving junk food in the late afternoon. And, it’ll help buy you enough time to make a healthy dinner before ‘hangry’ hits.

What's your favourite afternoon snack that includes protein? Share it in a comment below!

Curious about how I can help you achieve your health and nutrition goals? Schedule a (free) call to find out.

Beets: What to Do With Them

beets what to do

These versatile root veggies are one of my favourites! A classic storage, root veggie, you can find local ones throughout the winter. Beets have been making headlines lately because they may help boost exercise performance. Many kids like them because of their naturally sweet taste. However, people often wonder what the heck to do with them. So I’m sharing a couple of my favourite ways to use beets.  

Grated – Raw Beets

Beets don’t even need to be cooked. Simply wash them, peel off the outer skin, and grate them into a salad.

It doesn’t get any easier than that!

Roasted Beets

When I’m turning on the oven to cook something, I often pop a few beets in at the same time – either for a warm side-dish today, or for chilled as a salad in the future.

  1. Wash beets and cut off any long tails or furry top bits.
  2. Cut a piece of tin foil large enough to wrap the beet in. Lay it on the counter, shiny side up. Pour a dollop of olive oil in the centre.
  3. Roll the beet around in the oil to coat it. Wrap the tin foil tightly around the beet.
  4. Repeat for each beet.
  5. Place wrapped beets on a cookie tray or in a baking dish.
  6. Roast until tender, how long this takes depends on the size of the beets and the heat of your oven – at 350 degrees F it may take as long as 2 hours; at 425 degrees F it may take as short as 45 min.

Beet and Bean Borscht

From: Pulses: Cooking with Beans, Peas, Lentils and Chickpeas

This is a fantastic, hearty and tasty, full meal in one pot, vegetarian borscht (perfect for Meatless Mondays). While the recipe takes a little longer to cook, it makes a lot of soup. And, this soup tastes great re-heated. Freeze leftovers (without the yogurt or sour cream topping) in small batches.

Makes 6 Litres

  • 3 tablespoons canola oil
  • 1 large onion, chopped
  • 1 garlic clove, minced
  • 2 carrots, diced
  • 3 celery stalks
  • 3 cups green cabbage, shredded (a Cuisinart or food processor makes shredding quick work)
  • 3 cups beets, peeled and chopped
  • 10 cups vegetable stock (home-made or lower sodium)
  • 4 cups beans such as navy beans or white kidney beans (canned or cooked from dry)
  • ½ cup canned or fresh tomatoes
  • 2 tablespoons lemon juice
  • 1 teaspoon fresh cracked pepper
  • 1 bunch fresh dill (or parsley)
  • plain yogurt or sour cream

Directions

  1. In a big soup pot, sauté onion and garlic in oil until softened.
  2. Add carrots, celery and cabbage and sauté for about 3 minutes.
  3. Add beets and stock and cook for about 1 hour or until beets are slightly tender.
  4. Add beans, tomatoes, lemon juice, pepper and dill. Warm thoroughly.
  5. Serve topped with a dollop of yogurt or sour cream.
  6. Enjoy!

Click here for more healthy recipes.

1 Simple (and Overlooked) Step to Get Picky Eaters to Eat More

get picky eater to eat more

There’s a very simple technique to get picky eaters to eat more. It’s something that I always look for when working with individual families. I can’t tell you how often it’s missed by parents. Let’s just say a lot. So, what’s this super simple tip? Make sure your child has their feet resting on something solid. Kids eat best when they have something solid to rest their feet on. Take a peek at your child’s feet when they’re sitting in their highchair or booster seat. Are their feet dangling? If you want your child to eat better, get them something on which to rest their feet.

Have you ever sat at a bar stool that didn’t have a footrest? Did it feel unsettling to have your feet dangling? Likely, yes.

This is something that I’ve looked for since I started my practice in 2008. But I never knew why kids ate best when their feet are supported. Then last month I attended a workshop and learned why. The reason is that while eating is a priority for our bodies, there are two priorities that supersede eating: 1) breathing; and, 2) staying upright (i.e. not falling on our heads). When your child’s feet aren’t resting on something solid, their bodies are required to focus on not falling over. This takes away from the focus on the task of eating. Babies and young children under 3 years of age are still novice eaters and they need to pay full attention to the task of eating. By providing a solid footrest, you’re removing a big source of distraction.

Some highchairs are adjustable. These are my favourites. Don’t have an adjustable chair? Not to worry, just MacGyver a footrest for your child. Inexpensive footstools (usually used at the bathroom sink) work well. As do a stack of phone books – although these are getting harder to come by.

The perfect height for your footrest is the height where your child’s feet are 90 degrees from their legs. In other words, your child is resting flat-footed.

Remember, check your footrest every couple of months. Kids grow!

Get personal help for your picky eater. Book an information call today.

It's a Great Day to Start a New Healthy Habit

meditation photo_medmed

It may be Tuesday September 8th, but for me it’s the first day of a new year. It’s the day after Labour Day. For many kids it’s the first day of a new school year. And while it’s been 12 years since I was in school, I can’t shake the itch to start fresh at this time of year. Regardless of how long it’s been since you went back to school, this week is a fantastic time to start something new. I mean, any day is the first day of the rest of your life. Why not start a new healthy habit today?

If you’ve been connecting with me on Facebook or Instagram you’ve seen that 2 weeks ago I started a new daily meditation habit (that picture above is a shot from 1 of my meditation spots). I started meditating sporadically many years ago. Over the winter I increased the frequency to several times a week. I liked what it was adding to my life. So one random Sunday I decided to pick up my game and meditate daily. I’m aiming for 365 days. I admit that I’ve been tempted to skip days. But so far I’m proud to let you know that I’m 15 for 15.

What new habit will you start this week? Here are a few ideas to spark your inspiration:

  • Pack a lunch. Not only is this a healthier habit than eating out every day, but you’ll save money too.
  • Turn off the screens during meals. It’s a simple way to enjoy more pleasure from your food. And, by being more in-tune with your body, you’ll likely eat less (or should I say, over-eat less).
  • Buy a water bottle to stimulate yourself to drink more water.
  • Meal plan for the week.
  • Make a point of trying 1 new vegetable each week.

Share you’re new habit in a comment below. Articulating your commitment increases the likelihood that you’ll do it!

Healthy Kids Snack - Banana Roll Ups

healthy kids snack banana roll ups

Sometimes the classics are a classic for a reason. Bananas and peanut butter simply taste great together. Here's a fun way to bring this classic duo together in a healthy kids snack. I'm choosing to share it today because it's easy for young hands to manage. Perfect if you're gearing up to pack snacks or a lunch for little ones with back-to-school next week. This works well with peanut butter, other nut butters (e.g. almond butter) and the non-nut butters if your child attends a nut-free facility.

Hey, it's also a delicious idea for those of us who are young at heart :)

Banana Roll-Ups Ingredients 2 small tortilla wraps, whole wheat ¾ medium banana 1 tbsp natural peanut butter, nut butter or non-nut butter ½ tsp honey (optional) 1 dash cinnamon, ground

Banana Roll-Ups Directions

  1. Slice banana.
  2. Spread nut butter or non-nut butter on wraps.
  3. Top with bananas.
  4. Drizzle honey and add a dash of cinnamon.
  5. Roll (pack in lunch boxes) and enjoy.

Get more healthy, simple, kid-friendly recipes.

1 Simple Tip to Help Your Baby Gagging Less During Feeding

baby gagging

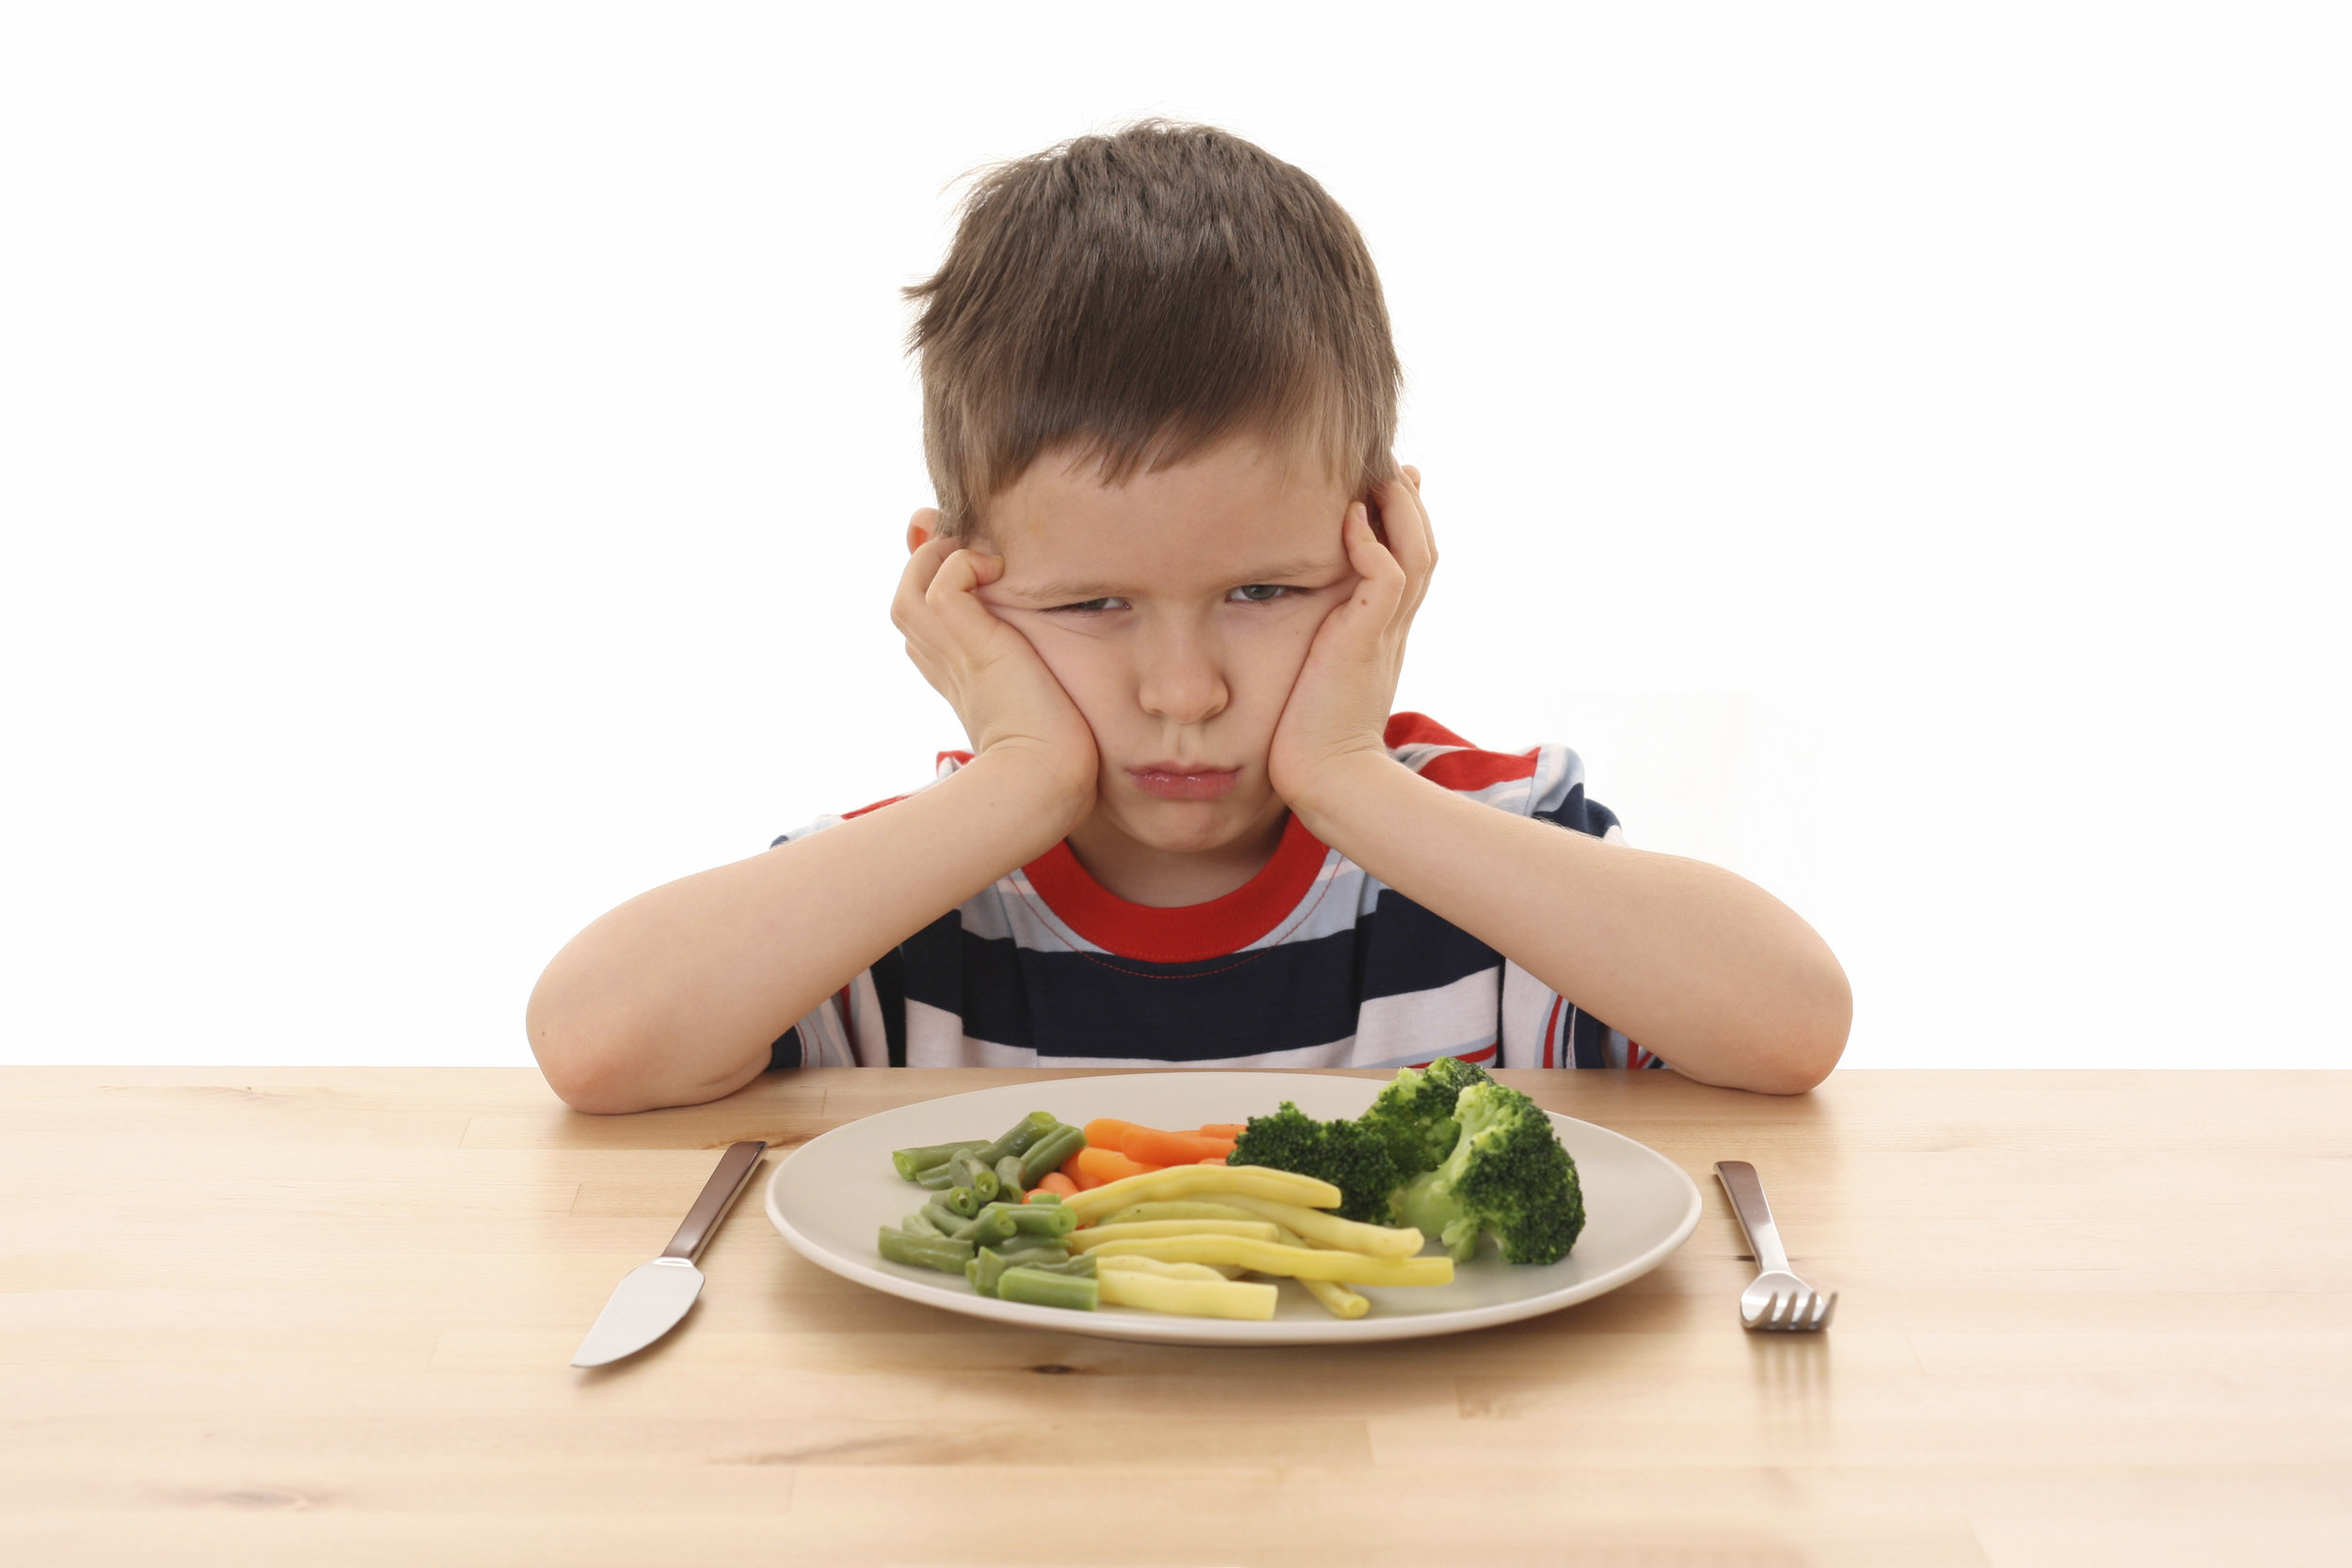
Pretty much all babies gag sometimes when then they first start eating solid foods. But, some babies gag more than others. Baby gagging can be very frightening for moms and dads and I get a lot of questions about it when I lead my Introducing Solid Foods workshops. I know that you are busy and exhausted so you like my blog posts short and to-the-point. If you’re really nervous about introducing your baby to solid foods, and/or are looking for a more fulsome description of gagging versus choking, I recommend coming out to one of my in-person workshops or getting in touch with me to find out more!

The focus of this post is on how to help babies who gag a lot to become less gaggy so that they can be more successful at eating solid foods.

For this tip, I’m assuming that you’re starting solids in that ‘just right’ window of about 6 months old. And, that your health professional has ruled out any medical cause for your baby’s gagging.

It’s often said that some babies have a “sensitive gag reflex”. But for most babies this isn’t the case. It’s not that their reflex is too sensitive, it’s that it’s in the wrong place.

You see, babies and adults have different mouth physiology. In adults, the majority of our tastebuds are on the tip of our tongues and our gag reflex is way in the back of our mouths. A fun way to test this is to place food in different parts of your tongue and notice how differently it will taste.

In babies, the majority of their tastebuds are at the very back of the mouth and their gag reflex is at the front of their mouth. This makes sense because for the first months of life babies are nipple-fed (either breastfed or bottle). To feed, babies place nipples to the very back of their mouths. So Mother Nature has the tastebuds at the back, where baby will taste their breastmilk/formula. The gag reflex is at the front of the mouth where it’s out of the way for nipple-feeding and where it protects babies from putting items in the front of their mouths that they could choke on.

Starting at about 4 – 6 months, the gag reflex and tastebuds migrate in opposite directions to swap places into the grown-up positions.

Most gaggy babies don’t have overly sensitive gag reflexes. Instead, their gag reflexes are still too far forwards.

What stimulates the gag reflex to move backwards? Having things in your baby’ mouth. Particularly things that your baby can stick towards the back.

So, your baby sticking their hands (and feet) in their mouth is really them working to move their gag reflex backwards. So is mouthing Sophie the Giraffe and other chewable toys that babies can stick deeper into their mouths. Toys like teething rings that stay at the very front of their mouths won’t help because it’s the presence of things ever deeper into your baby’s mouth that stimulates the backwards movement of their gag reflex.

So what’s the 1 tip to help baby gagging?

Let them play with toys they can safely stick in their mouths.

Now to be clear, I’m not recommending that you allow your baby to chew on things that they can choke on. I said “safely stick in their mouths”. What I’m recommending is to allow your baby to play with chewable toys and other objects that can safely go further back in their mouths. You want to look for long things that your baby can’t get a bite off of. Examples include:

  • Their own hands (and your fingers).
  • Sophie the Giraffe.
  • Toy key rings.
  • The spoon that you feed your baby with.
  • Whole, big, raw carrots or parsnips (big enough in diameter that your baby can’t bite off a chunk).
  • Ice cubes in a mesh feeding bag (I only recommend plain water ice cubes, not frozen foods).

Given the opportunity, babies will do lots of chewing on these objects. Know that they’re not just playing. They’re playing with a purpose. Playing is their job at this age. Your baby is playing with the purpose of developing the skills to eat.

Nutrition Game Changer: Cook The Night Before

cook-the-night-before

Last month I introduced the concept of nutrition game changers. Nutrition game changers are foods or simple habits that can make a big impact in your health. Some might use the term ‘nutrition hacks’. Today, I had planned to share with you a different habit. But I noticed that, with the nights cooling off again, I’ve been using this habit again. I do it a lot myself. And, it’s helped a number of clients too. I realized that this one simple habit can have a big impact on your health because it makes it easy to eat a lot of healthy foods that you might not otherwise eat. So, what’s this simple habit? Cook the night before.

Cook the Night Before

It’s a nutrition game changer for two huge reasons:

  1. It lessens the stress of getting dinner on the table.
  2. It makes it possible to eat healthy foods like whole grains, beans cooked from scratch, and longer-cooking veggies.

I’ve heard it called the witching hour. You know, that window of time between finishing work, commuting through traffic, picking the kids up from daycare, and making (and eating) dinner. For many people, it’s the most stressful time of the day. No one I know has an hour (or more) to cook dinner. Most people have somewhere from 20 – 30 minutes. Our modern lives have squished this time so much that it’s no wonder that take-out, drive-throughs, and pre-prepared food sales are through the roof. They’re survival techniques. You always ask me for help to get from survival to thriving. Cooking the night before can be a huge help.

No, I’m not talking about spending hours in the kitchen in the middle of the night! I’m talking about multi-tasking. You are likely home for several hours in the evening, after dinner but before you go to bed. Use this time to cook.

There are lots of healthy foods that take almost no work, but they take a long time to cook. Take a few minutes for prep, get the food cooking, set a timer, and then set off with your other evening activities. I personally do the prep while I’m already in the kitchen cooking my dinner for this evening. I don’t have kids so that works. If doing anything else besides preparing tonight’s dinner will take you over the edge, then do the prep later.

When the food is cooked, simply allow them to cool at room temperature and then store them in the fridge. They’ll store for several days in the fridge. On the day that you want to eat them for dinner, simply re-heat them in the microwave or steam them. (Place at least 1 inch of water in the bottom of a double boiler. Bring to a boil over high heat. Place your food in a bowl inside the double boiler. Steam until heated).

What Healthy Foods Can You Cook the Night Before?

  • Whole grains. E.g. pot barley, brown rice, wild rice, farro. They all take 45 – 60 minutes to cook. But the prep is easy. Just add them to a pot with water, bring to a boil, reduce the heat to simmer, set your timer and you’re done.
  • Winter squash. E.g. spaghetti squash, butternut, acorn squash. Preheat the oven to 425 degrees F. For all but spaghetti, cut the squash in half lengthways, scoop out the seeds. Pour a splash of water in the seed cavity. Place in a baking dish. Cover with tin foil. Bake for 45min-1 hour (until the flesh is soft when you test it with a fork). For spaghetti squash: leave the squash whole, pierce all over with a fork. Cover with tin foil. Bake for 1 hour or longer (until the squash gives easily to your touch).
  • Root veggies. E.g. beets, yams. There are lots of ways to bake these veggies. Techniques vary by veggie. But unless you take a long time to prep them by cutting them into small pieces, they’re going to take 45min – 1 hour to bake. Here’s one minimal prep time technique each for beets and yams: Preheat the oven to 425 degrees F. Wash but don’t peel the beets. Remove any stems or skinny roots. Rub with olive oil. Wrap in tin foil and place in a baking dish. Roast until soft to the touch. The time will vary based on the size of your beets. Yams can be cooked at the same temperature. Wash but don’t peel the yams. Pierce all over with a fork. Wrap in tin foil. Bake for 45min- 1 hour.
  • Dried beans. Cooking beans from dry is not only cheaper, but it avoids the exposure to BPA in the liner of most cans. Beans take 2 simple prep steps – one the morning before and one the night before. In the morning, measure out your beans, place in a bowl, cover with water (at least 1 inch above the beans), and sit at room temperature all day. At night, drain the beans,  place them in a large pot, add fresh water to cover at least 1 inch above the beans, bring to a boil, reduce the heat to simmer, set your timer and you’re done.

Extra Tip: All of these foods make fantastic whole-meal salad ingredients. Cook extra the night before and enjoy them both (cold) as a whole meal salad for your lunch and warm as a part of dinner.

Looking for new recipe ideas? Find lots of great healthy recipes here.

3 Ways to use Farmers’ Markets to Get Your Child to Eat Veggies

3 Ways to use Farmers’ Markets to Get Your Child to Eat Veggies

It’s the height of summer and farmers' markets are approaching their peak. Perhaps you already shop at your local farmers’ market. Or, you’ve been meaning to check out the one in your neighbourhood. I’ve been a big fan of farmers’ markets since before the locavore movement made it cool. I have fond childhood memories of waking up early, piling into the car, and driving out of the city to the big farmers’ market in the country. Shopping at farmers’ markets supports your local economy, builds food security, and promotes community. Farmers’ markets are also a fantastic opportunity to get your kids excited about vegetables – from toddlers to pre-teens. Here are 3 fantastic activities to harness the opportunity at the farmers’ market to maximize your picky eaters’ enthusiasm for veggies and fruit.

  1. Helping Hands. Let your little one pick your produce. For example, tell her that you need 10 potatoes (or 1 head of lettuce, or 5 pears, etc). Then, let her pick and bag the 10 potatoes. Encourage “help” from the vendor – ask him questions like “How do you pick the best potatoes?” or “How do you know that a watermelon is ripe?” This is a great way to engage the pickiest eaters because it doesn’t even involve tasting the food. However it gently gets them to explore and feel ownership for the veggies/fruit. Both of which help them move towards trying it.
  2. Different Varieties, Same Food. Another gentle way to help kids be open to trying new foods is to have a taste testing of different varieties of the same food. Choose a food that your child already eats. Then choose other colours and shapes of the same food from the farmers’ market. Prepare all the varieties and try them all, comparing them. Take cucumbers for example: pick up one each of field cucumber, lemon cucumber, long English cucumber, pickling cucumber, and any other variety that you can find. When you get home, cut slices of each variety and lay them out on a plate. Gather your family. Try each one. Describe all your senses – how do they look, smell, taste? Is one sweeter, one more sour, one have a thicker skin?
  3. Kids’ Choice. Let your child choose any one vegetable or fruit at the market. Let kids pick themselves, or have them talk with the vendors to get recommendations such as “what’s especially yummy today?” or “My favourite vegetable is broccoli and I don’t like radishes, what would you recommend that I try?” Prepare your child’s choice together later that day. Older kids can help research and choose recipes. This will inspire pride and ownership of this food which helps many kids be open to taste it. You may want to set a budget ahead of time – otherwise your child may choose the giant, $30 hubbard squash, LOL!

One final (and important) note: It’s all in the attitude. Yours. Do these activities with your kids in the spirit of fun and exploring. Not in the spirit of forcing. Their enthusiasm will soar. And, with their new-found enthusiasm, they may feel brave enough to try the veggies (and perhaps even like them).

Banana Ice Cream (Dairy and Sugar Free)

banana ice cream

I wish that I had discovered this recipe earlier in my life. It’s creamy, smooth and delicious – just like ice cream! Banana ice cream.

While it’s vegan and sugar-free, the best thing about this recipe (besides the taste) is that it only includes 1 or 2 ingredients. How great is that!

The secret is very ripe bananas. Buy them when you see them in the store. Slice and freeze them. Then you’re ready to make ice cream anytime you wish.

Blending the bananas does take a little while. At first they will break into a chunky slurry and you will likely think that this “ice cream” idea doesn’t work. Be patient. Next it will form one big ball. Then, suddenly, it will become a beautiful, smooth, whipped texture – just like ice cream. If you haven’t added any strongly coloured flavourings, the colour of your bananas will also suddenly lighten considerably to a creamy off-white. That’s what you’re looking for – your “ice cream” is ready!

There are likely hundreds of flavor combinations. I’m sharing the plain version (so you know the base recipe) along with 3 flavour ideas. My favourite is the cinnamon.

Banana Ice Cream Directions

  1. Peel and slice bananas. Freeze.
  2. Place frozen sliced bananas in a blender. Add flavouring ingredients. Blend until smooth.

Banana Ice Cream Ingredients

Plain

1 cup              sliced bananas

Cinnamon

1 cup              sliced bananas

¼ tsp              cinnamon

Chocolate

1 cup              sliced bananas

½ - 1 tsp        cocoa

Half a teaspoon of cocoa results in a banana ice cream with just a hint of chocolate. One teaspoon gives a full chocolate flavour. Choose a level that you enjoy.

Strawberry

2/3 cup          sliced bananas

1/3 cup          strawberries

This combination works best if you partially blend the bananas first until they are just about to start creaming. Then add the strawberries. The result will be a creamy ice cream with strawberry flavour. Adding the strawberries at the same time as the bananas results in a more icy rather than creamy texture (more sorbet-like rather than ice cream-like).

Check out more healthy recipes.

Picky Eater Success Strategy: Deconstructed Dishes

This is a favourite picky eater success strategy. It really can help you make one meal for the whole family. I have no idea why many kids don’t like their foods to touch. Another mystery that stumps me is why when sauces touch foods it’s considered unacceptable, but dipping is fun and yummy.

These are just 2 of the common great unsolved mysteries of young children’ eating habits. You’ll drive yourself crazy if you try to figure out why it is this way. It’s equally futile to try to rationalize with your child about how peas that have touched chicken are no different than peas that haven’t touched chicken.

So don’t waste your time (and brain cells). Leave it be and trust that (eventually) they’ll grow out of it.

In the meantime you aren’t relegated to eating sauce-free meals. Or, making your child a completely different dish every night. Instead, serve your child deconstructed dishes.

Picky Eater Success Strategy: Deconstructed Dishes

What I mean by “deconstructed” is to serve your child all the same components of your meal – but in a manner so that they aren’t touching. Take a beef and broccoli stir-fry for example. Cook a small amount of the meat, broccoli, and other veggies in the pan before you add the sauce. Remove them and set aside. Continue cooking the stir-fry with the rest of the ingredients and sauce. On your child’s plate place each of the items so that they are not touching each other, i.e. some beef, broccoli, other veggies, plain rice, and a small amount of sauce (perhaps in a dipping container like a small ramekin or saucer). And, place a very small amount of the stir-fry with all the foods touching with the sauce on it (like you are eating it).

“Deconstructed” meals are a fantastic compromise because they:

  • Allow you to eat a wide variety of dishes.

  • Allow your child to join you in sharing dishes.

  • Make your child feel confident with food because he has control over what ingredients he does and doesn’t eat.

Book an information call today to find out how I can help your child.

Fresh Fruit Granitas

Fresh Fruit Granitas

Similar to a slushie but made with real fruit, granitas are super refreshing in the summer heat.

They’re easy to prepare. The only tricky thing is to plan ahead so that you’re home and you remember to break up the ice crystals every hour (I set the alarm on my phone to remind me).

Kids can help measure ingredients, push the buttons on the blender, and scrape the ice crystals.

The fruit flavor is strong in granitas. The recipes here are listed from the most mild to the strongest. If your little ones prefer mild flavours, stick to the melon granitas. The kiwi granita is so strong that it almost made my eyes water (which I enjoyed on a hot afternoon).

Fresh Fruit Granitas - Directions

The steps are the same for all the recipes:

  1. In a saucepan, combine sugar and water.
  2. Bring sugar water to a boil until the sugar is well dissolved.
  3. Remove from the heat and let cool for 10 minutes.
  4. In a blender, combine the fruit (removed from it’s peel and pits), fruit juice (or other liquid), and sugar water.
  5. Pour into a non-metal baking dish, such as a glass lasagna pan.
  6. Place in the freezer. Freeze for 1 hour.
  7. Remove from the freezer and scrape thoroughly with a fork, breaking up the ice crystals.
  8. Return to the freezer for 1 hour. Again, remove from the freezer and break up the ice crystals with a fork. Repeat at least 2 more times.

Fresh Fruit Granitas - Recipes

Cantaloupe

Adapted from: http://www.whiskaffair.com/2013/03/cantaloupe-lemon-and-mint-granita.html

1                      cantaloupe

1/4 cup          sugar

¼ cup             water

4 TBSP            fresh lemon juice

Raspberry-Watermelon

Adapted from: http://whipperberry.com/2013/06/raspberry-watermelon-granita.html

5 cups             cubed, de-seeded watermelon

2.5 cups          raspberries

½ cup             sugar

½ cup             cran-raspberry juice cocktail

(Combine sugar and cran-raspberry juice cocktail in saucepan.)

Pineapple-Mango

Adapted from: http://www.muybuenocookbook.com/2013/03/pineapple-and-mango-granita-blendtec-giveaway/

Juice from 2 limes

1/3 cup          sugar

1                      pineapple, peeled, cored and diced

2                      mangos, peeled, pitted, and diced

(There’s no heating the sugar in this recipe. Simply combine all ingredients in a blender.)

Kiwi

Adapted from: http://dhaleb.com/2010/03/

5                    kiwis

½ cup           sugar

½ cup           water

1 cup              club soda

2 teaspoons   lime juice

See more delicious, healthy recipes here.