Beets: What to Do With Them

beets what to do

These versatile root veggies are one of my favourites! A classic storage, root veggie, you can find local ones throughout the winter. Beets have been making headlines lately because they may help boost exercise performance. Many kids like them because of their naturally sweet taste. However, people often wonder what the heck to do with them. So I’m sharing a couple of my favourite ways to use beets.  

Grated – Raw Beets

Beets don’t even need to be cooked. Simply wash them, peel off the outer skin, and grate them into a salad.

It doesn’t get any easier than that!

Roasted Beets

When I’m turning on the oven to cook something, I often pop a few beets in at the same time – either for a warm side-dish today, or for chilled as a salad in the future.

  1. Wash beets and cut off any long tails or furry top bits.
  2. Cut a piece of tin foil large enough to wrap the beet in. Lay it on the counter, shiny side up. Pour a dollop of olive oil in the centre.
  3. Roll the beet around in the oil to coat it. Wrap the tin foil tightly around the beet.
  4. Repeat for each beet.
  5. Place wrapped beets on a cookie tray or in a baking dish.
  6. Roast until tender, how long this takes depends on the size of the beets and the heat of your oven – at 350 degrees F it may take as long as 2 hours; at 425 degrees F it may take as short as 45 min.

Beet and Bean Borscht

From: Pulses: Cooking with Beans, Peas, Lentils and Chickpeas

This is a fantastic, hearty and tasty, full meal in one pot, vegetarian borscht (perfect for Meatless Mondays). While the recipe takes a little longer to cook, it makes a lot of soup. And, this soup tastes great re-heated. Freeze leftovers (without the yogurt or sour cream topping) in small batches.

Makes 6 Litres

  • 3 tablespoons canola oil
  • 1 large onion, chopped
  • 1 garlic clove, minced
  • 2 carrots, diced
  • 3 celery stalks
  • 3 cups green cabbage, shredded (a Cuisinart or food processor makes shredding quick work)
  • 3 cups beets, peeled and chopped
  • 10 cups vegetable stock (home-made or lower sodium)
  • 4 cups beans such as navy beans or white kidney beans (canned or cooked from dry)
  • ½ cup canned or fresh tomatoes
  • 2 tablespoons lemon juice
  • 1 teaspoon fresh cracked pepper
  • 1 bunch fresh dill (or parsley)
  • plain yogurt or sour cream

Directions

  1. In a big soup pot, sauté onion and garlic in oil until softened.
  2. Add carrots, celery and cabbage and sauté for about 3 minutes.
  3. Add beets and stock and cook for about 1 hour or until beets are slightly tender.
  4. Add beans, tomatoes, lemon juice, pepper and dill. Warm thoroughly.
  5. Serve topped with a dollop of yogurt or sour cream.
  6. Enjoy!

Click here for more healthy recipes.

Banana Ice Cream (Dairy and Sugar Free)

banana ice cream

I wish that I had discovered this recipe earlier in my life. It’s creamy, smooth and delicious – just like ice cream! Banana ice cream.

While it’s vegan and sugar-free, the best thing about this recipe (besides the taste) is that it only includes 1 or 2 ingredients. How great is that!

The secret is very ripe bananas. Buy them when you see them in the store. Slice and freeze them. Then you’re ready to make ice cream anytime you wish.

Blending the bananas does take a little while. At first they will break into a chunky slurry and you will likely think that this “ice cream” idea doesn’t work. Be patient. Next it will form one big ball. Then, suddenly, it will become a beautiful, smooth, whipped texture – just like ice cream. If you haven’t added any strongly coloured flavourings, the colour of your bananas will also suddenly lighten considerably to a creamy off-white. That’s what you’re looking for – your “ice cream” is ready!

There are likely hundreds of flavor combinations. I’m sharing the plain version (so you know the base recipe) along with 3 flavour ideas. My favourite is the cinnamon.

Banana Ice Cream Directions

  1. Peel and slice bananas. Freeze.
  2. Place frozen sliced bananas in a blender. Add flavouring ingredients. Blend until smooth.

Banana Ice Cream Ingredients

Plain

1 cup              sliced bananas

Cinnamon

1 cup              sliced bananas

¼ tsp              cinnamon

Chocolate

1 cup              sliced bananas

½ - 1 tsp        cocoa

Half a teaspoon of cocoa results in a banana ice cream with just a hint of chocolate. One teaspoon gives a full chocolate flavour. Choose a level that you enjoy.

Strawberry

2/3 cup          sliced bananas

1/3 cup          strawberries

This combination works best if you partially blend the bananas first until they are just about to start creaming. Then add the strawberries. The result will be a creamy ice cream with strawberry flavour. Adding the strawberries at the same time as the bananas results in a more icy rather than creamy texture (more sorbet-like rather than ice cream-like).

Check out more healthy recipes.

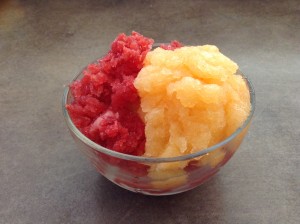
Fresh Fruit Granitas

Fresh Fruit Granitas

Similar to a slushie but made with real fruit, granitas are super refreshing in the summer heat.

They’re easy to prepare. The only tricky thing is to plan ahead so that you’re home and you remember to break up the ice crystals every hour (I set the alarm on my phone to remind me).

Kids can help measure ingredients, push the buttons on the blender, and scrape the ice crystals.

The fruit flavor is strong in granitas. The recipes here are listed from the most mild to the strongest. If your little ones prefer mild flavours, stick to the melon granitas. The kiwi granita is so strong that it almost made my eyes water (which I enjoyed on a hot afternoon).

Fresh Fruit Granitas - Directions

The steps are the same for all the recipes:

  1. In a saucepan, combine sugar and water.
  2. Bring sugar water to a boil until the sugar is well dissolved.
  3. Remove from the heat and let cool for 10 minutes.
  4. In a blender, combine the fruit (removed from it’s peel and pits), fruit juice (or other liquid), and sugar water.
  5. Pour into a non-metal baking dish, such as a glass lasagna pan.
  6. Place in the freezer. Freeze for 1 hour.
  7. Remove from the freezer and scrape thoroughly with a fork, breaking up the ice crystals.
  8. Return to the freezer for 1 hour. Again, remove from the freezer and break up the ice crystals with a fork. Repeat at least 2 more times.

Fresh Fruit Granitas - Recipes

Cantaloupe

Adapted from: http://www.whiskaffair.com/2013/03/cantaloupe-lemon-and-mint-granita.html

1                      cantaloupe

1/4 cup          sugar

¼ cup             water

4 TBSP            fresh lemon juice

Raspberry-Watermelon

Adapted from: http://whipperberry.com/2013/06/raspberry-watermelon-granita.html

5 cups             cubed, de-seeded watermelon

2.5 cups          raspberries

½ cup             sugar

½ cup             cran-raspberry juice cocktail

(Combine sugar and cran-raspberry juice cocktail in saucepan.)

Pineapple-Mango

Adapted from: http://www.muybuenocookbook.com/2013/03/pineapple-and-mango-granita-blendtec-giveaway/

Juice from 2 limes

1/3 cup          sugar

1                      pineapple, peeled, cored and diced

2                      mangos, peeled, pitted, and diced

(There’s no heating the sugar in this recipe. Simply combine all ingredients in a blender.)

Kiwi

Adapted from: http://dhaleb.com/2010/03/

5                    kiwis

½ cup           sugar

½ cup           water

1 cup              club soda

2 teaspoons   lime juice

See more delicious, healthy recipes here.

4th Annual Home-made Popsicles (a.k.a. Ice Pops, Paletas)

Home-made popsicles, healthy, no sugar

I love that the healthy home-made popsicles trend is continuing (also known as ice-pops or paletas). Have you jumped on board? It's a fantastic way to enjoy some fruits and veggies. All these recipes are delicious. You won't believe that they have no sugar. Kids often love to help make them too. Here are 4 new home-made ice pop recipes for you to enjoy this summer. In case you're wondering why there are 4 recipes but only 3 in the picture, I ate all the banana-strawberry-orange ones before taking the photo :)

Home-Made Popsicles Directions

All the steps are the same for all home-made popsicles. And they're very easy:

  1. Combine ingredients in a blender.
  2. Blend until smooth.
  3. Pour into the ice-pop molds.
  4. Freeze.
  5. ENJOY!

Home-Made Popsicles Ingredients

Healthy Creamsicle

This simple 3 ingredient recipe is inspired by one of my childhood favourites – creamsicles. But unlike creamsicles, the only sugar in this recipe is that naturally found in orange juice.

  • 1 cup coconut milk
  • 1 cup orange juice
  • ½ teaspoon vanilla extract

Banana-Strawberry-Orange

Use ripe bananas and in-season, local strawberries and these are naturally sweet – no added sugar is needed.

  • 1 medium banana
  • 10 strawberries
  • ½ cup orange juice

Watermelon-Cucumber-Spinach

Don’t let the deep green colour of this recipe discourage you. It’s my favourite of the 4 recipes here – super refreshing and subtly sweet.

  • 2 cups watermelon, cubed
  • 6 large spinach leaves, thick stems removed
  • 2 inches cucumber, peeled and seeds removed
  • ½ cup coconut water

Pink Grapefruit

This recipe doesn’t need to be blended. Simply juice the grapefruits and combine with the soda water in a pitcher. Pour into the molds and freeze. If you find pink grapefruits too sour, you can substitute freshly squeezed orange juice.

  • 1 cup freshly squeezed pink grapefruits (approx 3 grapefruits)
  • 1 cup soda water

See more healthy, delicious recipes for home-made ice pops.

Baked Avocado Eggs

Baked avocado egg

I'm a long-time lover of avocados and so I'm excited to see that many others have realized how delicious they are. And, that their healthy fat is not something of which to be afraid. Browsing around Pinterest for some cooking inspiration (I love Pinterest), I found this recipe. I like to give credit where credit is due, so here's the original recipe: http://www.popsugar.com/fitness/Baked-Eggs-Avocado-Recipe-30787252 This baked avocado egg recipe has all the creamy deliciousness of an eggs benny - without all the work of Hollandaise sauce. In other words, it's a perfect recipe for Easter breakfast. Finger Food Version: Cook a few minutes longer until both the whites and yolk are set (it's recommended that babies under 12 months don't have runny egg yolks). Cut the egg and avocado into finger-food size pieces. Or, spread on long, skinny pieces of toast.

Baked Avocado Egg Ingredients:

1 avocado

2 eggs

salt & pepper

Optional: toast

Baked Avocado Egg Directions:

  1. Preheat the oven to 425 degrees.
  2. Slice the avocados in half. Remove the pit. Scoop out enough flesh from the avocado,  so the egg will fit in the centre. Reserve this flesh for another recipe/snack.
  3. Slice a small piece off the back of the avocado halves so that they will sit flat without rolling around. Place the avocados in a small baking dish, making sure they fit tightly. If your dish is too big, scrunch up a piece of tin foil to fill the space.
  4. Season the avocado halves with salt and pepper. Crack an egg into each avocado half.
  5. Place in the oven and bake for 15 to 20 minutes. Cooking time will depend on the size of your eggs and avocados. And, how you like our eggs cooked.
  6. Enjoy scooped directly out of the avocados. Or, spread on top of toast.

Check out more healthy, delicious recipes here.

Healthy Shamrock Smoothies - Green Smoothies

I'm a true kid of the 1980's Canadian suburbs. Growing up, we went to McDonalds a couple of times a year. One of those times each year, guarenteed, was in March. Why? If you grew up similar to me, you already know the answer...Shamrock Shakes. I totally LOVED those green, mint milkshakes that McDonalds only had on the menu around St. Patrick's Day.

To be honest, I had totally forgotten about those shakes. Those childhood days are long gone. But last Spring, while on a surf trip in California, I had a smoothie that brought it all back. It was pistachio and mint, and it was DELICIOUS! Ever since then I can't get mint or pistachios off my mind. So, of cource I had to create recipes for a healthy, minty green smoothie in time for St. Patrick's Day.

I didn't remember exactly what was in that smoothie in California. So I bought all sorts of green ingredients. And, I created a second green smoothie. Why not?!

The directions are easy. Simply combine all ingredients in a blender and blend until smooth. Adjust the amounts to suite your tastebuds. Too thick? Add more liquids. Too thin? Add more solids.

The two recipes are:

Green Smoothie Pistachio-Mint

  • 1 tablespoon flax seeds

  • 3 tablespoons pistachios

  • 3/4 cup milk (or plant-based alternative)

  • 1/3 cup plain yogurt

  • 1 cup (packed) baby spinach

  • 3 chopped dates

  • 2 tablespoons (packed) fresh mint

  • 1 teaspoon honey

Green Smoothie Avocado-Pistachio-Kale

  • 1 tablespoon flax seeds

  • 1/4 ripe avocado

  • 1/2 banana

  • 2 large kale leaves, centre ribs removed

  • 3 tablespoons pistachios

  • 1 cup milk (or plant-based alternative)

Chocolate Fruit and Nut Bark

chocolate bark_medmed

I'm frequently asked for healthy treat recipes. With Valentine's Day around the corner, I figured that today was the perfect time to share an idea for a healthy (and delicious) chocolate fruit and nut bark.

Like many of the food ideas that I share, this is more of a technique than a recipe. Pick and choose the dried fruit and nuts that you want to use. Add more or less chocolate. Once you get the hang of this you'll wonder why you've been eating cheap chocolate bars!

The healthiest options are raw (non-roasted, unsalted) nuts, unsweetened, unsulfured dried fruit, and dark chocolate with at least 70% cocoa.

Note: Chocolate does best when allowed to cool slowly. Make this the night before you want to eat it!

Chocolate Fruit and Nut Bark Ingredients

1.5 cups nuts (e.g. hazelnuts, cashews, peanuts, almonds, pistachios)

1.5 cups dried fruit (e.g. raisins, goji berries, mango, apricots)

400g chocolate (NOT semisweet baking chocolate)

Chocolate Fruit and Nut Bark Directions

  1. Chop larger fruit and nuts into bite-size pieces.
  2. Spread evenly over a parchment-lined baking sheet.
  3. Chop the chocolate.
  4. In a medium-size pot, bring 2 cups of water to a boil. Turn off the heat.
  5. Place the chopped chocolate in a large, heatproof (i.e. not plastic) bowl. Place the bowl over the boiling water. Using a spatula, stir the chocolate until it melts.
  6. Pour the chocolate over the fruit & nut mixture.
  7. Allow the bark to cool to room temperature. Then, refrigerate overnight.
  8. Cut into pieces and enjoy!

In this photo I'm testing out different fruit and nut combinations. It's a tough job but someone has to do it!

Matches made in heaven: hazelnuts and dried mango, cashews and goji berries, salted peanuts and raisins, almonds and golden raisins, pistachios and apricots.

Get more healthy recipes here.

Healthy Valentine's Day treat: Chocolate, fruit and nut bark.

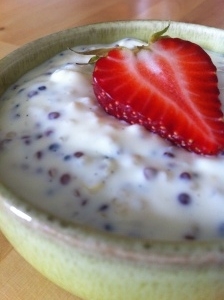
Creamy Quinoa Pudding

Creamy Quinoa Pudding

This is the #1 most frequently pinned recipe from my Pinterest boards. A totally delicious update on tapioca pudding from the cookbook Quinoa 365.

This dish is fantastic for little ones who don't like to eat meat or other protein-rich foods.  If you're looking for more ways to use quinoa, I highly recommend the book. I've enjoyed many of it's recipes.

Creamy Quinoa Pudding Ingredients

1/3 cup quinoa

2/3 cup water

2 cups half and half cream

2 large eggs

1/4 cup white or cane sugar (I use less)

2 Tablespoons cornstarch

1/2 teaspoon vanilla extract

Creamy Quinoa Pudding Directions

  1. In a saucepan, bring water and quinoa to a boil. Cover, reduce to a simmer and cook for 10 minutes.
  2. Turn the heat off and leave the covered saucepan on the burner for another 6 minutes.
  3. Fluff the quinoa with a fork and allow to cool.
  4. Place the cream in a medium saucepan and heat on medium-high until hot but not boiling (steam will rise from the top). Remove from the heat.
  5. In a small bowl, whisk the eggs, sugar and cornstarch with 1 TBSP of the hot cream.
  6. Add an additional 3 TBSP of hot cream, one TBSP at a time, whisking constantly.
  7. Whisk the tempered egg mixture into the saucepan and return to medium heat. Cook, whisking constantly, until the pudding has thickened.
  8. Remove from the heat and stir in the quinoa and vanilla.
  9. Pour the pudding into individual serving bowls.
  10. Cover and refrigerate until serving time.
  11. ENJOY!

Check out more healthy recipes.

Solid-Food Strikes: Should You Worry & What to Do

solid food strike Thank you to the VIP who asked me this question: “[My son is] 19 months. I still nurse him quite a bit, and for the last 4 days he has refused any kinds of foods…and wants to nurse every 30 mins. (He does this when he has a cold, and people tell me teething).  Besides driving me crazy, I am concerned about his nutrition...are these breastfeeding [solid food] strikes still providing him with what he needs?” 

Why Babies Do Solid Food Strikes

In general, it is quite normal for little ones to regress to just breastmilk or formula when they aren't feeling well, such as with a cold/flu or teething. It's similar to when we adults are sick with a cold or flu and all we consume for a couple of days is chicken soup.

Solid Food Strike: Should You Worry

Breastmilk or formula alone doesn't meet all of a 19 month old's nutrition needs. As long as it's just for a few days it doesn't have a significant impact on his overall nutritional health because our bodies store carbohydrate and fat for exactly these types of situations. Of course their bodies are smaller than ours so they can’t go as long without adequate nutrition as we adults can. If a breastfeeding strike, or perhaps a more accurate term is “solid-food strike”, lasts more than a couple of days I recommend having your little one seen by your health professional to determine if something else is going on and whether any supplemental intake is required. In other words, this is the point when individual assessment is needed – my generalized advice that I can provide in this form of Q & A is no longer appropriate.

Solid Food Strike: What to Do

Even if he’s refusing to eat solid foods, continue to provide the same opportunities to eat solids as you would normally. Although perhaps prepare smaller servings so that you waste less food if/when he refuses to eat. I recommend this for two reasons:

  1. Just as quickly as kids get sick, they get better. The next opportunity to eat may be the one that he’s feeling better at and decides to eat a ton because his appetite’s returned.
  2. Sticking to your routine will make it easier to transition back when he’s feeling better.

If you suspect that it’s teething that’s causing the solid-food strike, then plan snacks that are soothing for sore gums. Cold and/or smooth are characteristics that can be soothing for sore gums. Examples include:

More Super Smoothies (for Picky Eater Kids)!

smoothies picky eater kids It happened again yesterday. I was leading a workshop and a parent asked me: “Is it wrong to give my child smoothies with veggies in them? Is this considered hiding veggies?” Rarely a workshop goes by without a parent asking me about smoothies for their picky eater kids. They’re such a popular trend these days. While I touched on this in last week’s blog post; it’s such a common question that I get about healthy snacks for kids that I thought that it was worthwhile to expand on it today. And, share some ideas for smoothie ingredients.
I think that smoothies are a great way to provide vegetables, fruit, protein, and healthy fats for kids. BUT there are a couple of key points to follow to be using them to role model healthy eating and support your child to try new foods on their own:

  1. Don’t lie about the ingredients. This is when you start veering into the “hiding” territory. If you’re waking up at 2am to puree foods so that your child doesn’t know that they’re in a smoothie, then you’ve strayed in the wrong direction. This doesn’t mean that you have to read out to your child a list every last ingredient in a smoothie. But don’t deny a food’s existence. Having your child help make the smoothie (like I suggested last week) is a great way for them to know what’s in it.
  2. Continue to serve “obvious” vegetables (and eat them yourself). Yes, even if your child doesn’t eat them, you’re role modeling choosing to eat vegetables. You’re teaching an important life lesson that I promise is sinking in (even if the vegetables aren’t getting eaten currently).

As I mentioned above, smoothies are a great way to provide vegetables, fruit, protein and healthy fats in a way that many picky eaters will actually eat. Here are some ingredient ideas. Note that some of the ingredients (e.g. nuts) require a higher-powered blender. Mix and match the ingredients to find combinations that you love. And don’t’ be afraid to experiment to find new favs. My new favourite is pistachio-mint-banana, which I was introduced to while on vacation in California last month!

Smoothie Ingredients - Vegetables:

  • Spinach
  • Kale
  • Avocado (also helps a smoothie be creamy)
  • Carrot (I find carrot that’s already grated to blend better than larger pieces)

Smoothie Ingredients - Fruit (choose fresh or frozen fruit instead of juice):

  • Banana (also helps a smoothie be creamy)
  • Berries of any kind
  • Peaches
  • Mango
  • Pineapple
  • Orange
  • Kiwi

Smoothie Ingredients - Protein:

  • Yogurt
  • Cashews (or cashew butter)
  • Ground almonds (or almond butter)
  • Peanut butter
  • Pistachios
  • Pumpkin seeds (or pumpkin seed butter)
  • Hemp hearts

Smoothie Ingredients - Healthy Fats:

  • See all the nut and seed ideas above (including hemp hearts)
  • Avocado
  • Flax oil (or ground flax seeds)
  • Hemp oil
  • Fish oil
  • Vitamin D drops

Other tasty ingredients (that pack more of a taste punch than a nutritional punch):

  • Dates
  • Mint
  • Cocoa powder

Looking for more ideas? Check out the recipe for my Sunshine Smoothie (Orange-Pineapple-Fresh Turmeric) or these green smoothies.

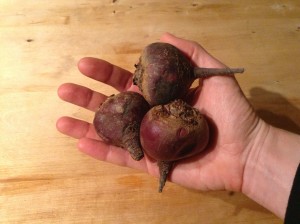
Beets: What to Do with Them

beet-recipes-dietitian-dietician-victoria-bc Aah, beets. These versatile root veggies are one of my favourites! As a dietitian, part of my job is to know how to prepare healthy foods like beets. So I’m sharing a couple of my favourite ways to use them. A classic storage, root veggie, you can find local ones (fairly cheap) throughout the winter here in Victoria, BC.

And, because of their naturally sweet taste, many kids like them.

However, people often wonder what the heck to do with them. Here are some of my favourite ways to use them.


Grated – Raw Beets

Beets don’t even need to be cooked. Simply wash them, peel off the outer skin, and grate them into a salad.

It doesn’t get any easier than that!

Grated veggies are a fantastic finger food for little ones to practice that pincer grasp.

However, be warned – beets stain! Pick up pieces from all surfaces (including the floor) quickly.

Grated, raw beets are a delicious part of my lentil-farro power bowl (full meal salad).


Roasted Beets

When I’m turning on the oven to cook something, I often pop a few beets in at the same time – either for a warm side-dish today, or for chilled as a salad in the future.

  1. Wash beets and cut off any long tails or furry top bits.
  2. Cut a piece of tin foil large enough to wrap the beet in. Lay it on the counter, shiny side up. Pour a dollop of olive oil in the centre.
  3. Roll the beet around in the oil to coat it. Wrap the tin foil tightly around the beet.
  4. Repeat for each beet.
  5. Place wrapped beets on a cookie tray or in a baking dish.
  6. Roast until tender, how long this takes depends on the size of the beets and the heat of your oven – at 350 degrees F it may take as long as 2 hours; at 425 degrees F it may take as short as 45 min.


Beet and Bean Borscht

Check out this fantastic hearty and tasty full meal in one pot, vegetarian borscht here. While the recipe takes a little longer to cook, it makes a lot of soup. And, this soup tastes great re-heated. Freeze leftovers (without the yogurt or sour cream topping) in small batches. I wanted to share it not only because it’s so tasty, but because it’s handy to have healthy meals like this in the freezer when the busy holiday season starts up.

Beans, beets and cabbage are all super healthy (and inexpensive) that I’m always looking for new recipes. I picked up this little pamphlet at the Saskatchewan pavilion at the 2010 Olympics. Did you know that we grow tons of beans, split peas and lentils here in Canada?

If the mixed textures in this soup are too advanced for your little one, simply take beans and pieces of the veggies out of the soup and place them in your little one’s dish/ on their tray.

Can I give finger foods if my baby doesn’t have teeth yet?

finger foods baby doesn’t have teethThank you to the parent who asked me this week’s question: "My baby doesn’t have any teeth yet. Can I give her finger foods?" The short answer is: yes! You don’t need to wait until a baby has teeth before giving finger foods.

Babies are ready for finger foods by 7 months, if not before.

Many babies won’t have teeth (or very many teeth) by this age.

It’s amazing to watch what they can handle with their gums. So go ahead and offer finger food versions of a wide variety of foods that your family eats.

Enjoy watching your little one discover the amazing variety of tastes and textures that food comes in!

Check out this video for iron-rich finger foods for babies.