2 Easy Matcha Desserts

First, I want to let you know that I am not a baker. Second, I love sweets. So, you know that if I'm sharing a dessert recipe it’s going to be delicious and super easy. The two recipes that I’m sharing today certainly fit this bill. With very few ingredients and steps, they really couldn’t get any easier. They also are healthy choices. And, they’re green – perfect ideas for celebrating St. Patrick’s Day next week. If you’re looking for more green ideas, check out the two green smoothies that I shared for last year’s St. Patty’s Day. I was inspired by a local Matcha café that I’ve been visiting lately. I saw that they had “cooking grade” matcha and decided to give it a try. I added it to two (simple) dessert ideas that I enjoy all the time. And they were really successful. Voila - matcha desserts. Enjoy! P.S. You can find matcha powder in many specialty tea shops or grocery stores with good Japanese food sections.

Matcha Banana ‘Ice Cream’

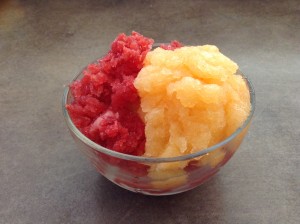
Matcha banana ice cream

You’ve got to love a recipe with only 2 ingredients! Prepare 1 banana per person. The ½ teaspoon gives a definite matcha taste to the ice cream. If you have a picky eater, you may want to decrease it to 1/4 teaspoon so there’s basically no matcha taste, just some green colour.

Ingredients

  • 1 banana (frozen)
  • ½ teaspoon matcha powder

Directions

  1. Take the banana out of the freezer 20-30 minutes before you plan to prepare the ice cream.
  2. Break banana into several pieces and place in the blender.
  3. Add the matcha powder.
  4. Blend until smooth. I use the “ice crush” setting on my blender.
  5. Enjoy!

Matcha-Coconut Chia Pudding

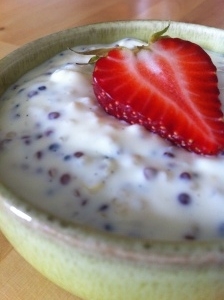
matcha desserts - matcha chia pudding

Serves 4

Feel free to reduce the sugar to zero in this recipe. I enjoyed the balance at 1 teaspoon. Choose a regular fat (i.e. not low-fat), canned coconut milk to get the creamy texture and rounded flavour.

Ingredients

  • 1 teaspoon matcha powder
  • 1 teaspoon sugar
  • 3 TBSP chia seeds
  • 1 cup coconut milk

Directions

  1. In a medium bowl or Tupperware container, mix together matcha and sugar.
  2. Add the chia seeds and coconut milk.
  3. Stir to combine well.
  4. Let sit on the counter for about 10 minutes to allow mixture to start to gel.
  5. Refrigerate overnight.
  6. Enjoy!

Check out more recipes here.
Peanut Banana Chocolate Ganache Bites

YAY! It's my annual chocolate recipe. Perfectly timed for Valentine's Day.

If you're new to following me you might wonder why a dietitian is sharing a chocolate recipe. Quite simply, because food is more than just fuel for our bodies. Food feeds our minds and soul too. Denying ourselves the pleasure of food isn't healthy.

This recipe is super simple to make. And WOW is it decadent. Like the middle of a truffle without that pesky shell. I first made experimented by making this in regular-sized muffin tins and it was simply too much (and believe you me, it takes a lot of rich chocolate to make me come to that conclusion!). Mini muffin tins make the perfect size. Just like those 2 bite brownies, but healthier for you and more decadently delicious.

These really are for dark chocolate lovers. So they may be more of an adult treat. But you never know. Make them with your kids and see what their verdict is.

The inspiration for this recipe was from chocolatecoveredkatie.com

If you follow these lifestyles, you'll be happy to know that these heavenly bites are vegan, paleo, gluten-free and have no added sugar.

You can easily make them peanut-free by omitting the peanuts. Go completely nut-free (note: they do contain coconut) or substitute pistachios, chopped almond, or hazelnuts for the topping.

Peanut Banana Chocolate Ganache Bites Ingredients

4 TBSP coconut butter (Note: This isn't the same as coconut oil. Also, if your jar of coconut butter has separated, scrape off the oil and use the lower level - the coconut butter)

1 ripe banana

3 TBSP cocoa powder

3 small pinches salt

4 TBSP unsalted peanuts

Peanut Banana Chocolate Ganache Bites Directions

This recipe happens really quickly so you'll want to prepare all your ingredients before you start cooking.

  1. On a small plate, mash the banana really well.

  2. Chop peanuts.

  3. In a small saucepan over medium heat, melt the coconut butter, stirring constantly.

  4. Add the mashed banana. Stir constantly until completely combined.

  5. Lower heat. Add cocoa powder and 1 pinch of salt. Mix well and remove from the heat.

  6. Moving quickly, spoon into a mini muffin tin. Be careful, the mixture is very hot.

  7. Top with chopped peanuts and sprinkle with salt.

  8. Freeze for 1 hour.

  9. Enjoy!

Note: The ganache bites are at the absolute perfect texture when eaten after freezing for 1 hour. If you make them ahead of time and freeze for longer, remove them from the freezer and warm them to room temperature for at least 30 minutes (otherwise they'll be rock hard).

Check out these other healthy chocolate recipes:

Chocolate Chia Pudding

Chocolate Nut Spread

Mint Chocolate Whip

Roasted Chickpeas - 4 Ways

It's official - 2016 is the year of the pulse! Pulses, such as chickpeas, are high in vegan-source protein, high in fibre, low-glyemic carbs, and contain lot of other nutrients. Did you know that we grow lots of them in Canada? Roasted chickpeas are a delicious way to eat more pulses. My friend Margie Barnard, a fantastic cook (we're talking Four Seasons Hotel), and I developed these recipes. We each had our favourites, so I’m sharing all four. The steps are the same for all of them.

Whole chickpeas are a choking hazard for little ones, so this is a good snack idea for kids 3 years and up (and us kids at heart).

Roasted Chickpeas Directions

  1. Drain and rinse the chickpeas.

  2. Pat dry the chickpeas until well dried (otherwise they’ll be mushy).

  3. Combine all the other ingredients in a medium-size bowl.

  4. Toss the chickpeas into the mixture. Coating the chickpeas well.

  5. Line a cookie sheet with parchment paper. Spread the coated chickpeas onto the parchment paper-lined sheet.

  6. We played around with the oven temperatures while they were cooking so I’m afraid that I don’t have exact temperatures and times for you. We started at 400 degrees for the first while, then stirred the chickpeas and reduced the oven temperature to 350 degrees. Keep a close eye on them while they bake. You’re looking for them to turn a golden brown colour. And, when you taste them, they have a crunchy shell and are soft in the middle. The recipes containing honey turned the darkest colour, the fastest.

  7. Allow to cool, then ENJOY!

Savoury Roasted Chickpeas

15oz can chickpeas

1/2 tsp garlic powder

1/2 tsp ground cumin

1/4 tsp salt

1/4 tsp pepper

2 Tbsp olive oil

Garam Masala Roasted Chickpeas

15oz can chickpeas

1 tsp garam masala

1/4 tsp salt

2 Tbsp olive oil

Honey Roasted Chickpeas

15oz can chickpeas

2 Tbsp honey

1 tsp sugar

1 tsp cinnamon

Sweet & Salty Roasted Chickpeas

15oz can chickpeas

2 Tbsp honey

1 tsp canola oil

1/4 tsp salt

See more healthy, delicious recipes.

Squash Soup with Orange and Ginger

squash-soup-carrot-orange-ginger

This squash soup, with its bright orange colour and warming ginger is my “chicken” soup that I eat when I have a cold or the flu. Or when I’m looking for comfort food to warm me on a cold day.

This is a “Kristen” recipe – very imprecise but also very flexible. It takes some time with all the chopping. I recommend making a big batch because it freezes well.

Squash Soup Ingredients

  • Vegetable oil (preferably olive oil)
  • Member of the allium family (onion, garlic, leek, shallots)
  • Ginger (I like about an inch)
  • 2 or 3 kinds of orange vegetables like winter squash (my favourite is butternut but any kind will work including pumpkin), carrots, yams, sweet potatoes
  • Vegetable stock, chicken stock or water (water will make the blandest soup – use as a last resort)
  • Orange juice
  • Salt or seaweed
  • Fresh ground pepper

Squash Soup Directions

  1. Finely chop the members of the allium family.
  2. Grate the ginger.
  3. Peel and chop the orange veggies. Cut squash, yams, and sweet potatoes into ½ to 1 inch pieces. Cut the carrots into coins. Carrots take longer to cook than squash and yams/ sweet potatoes are in the middle. So, you will want the carrot pieces smaller than the squash pieces and the yam/ sweet potato pieces middle in size.
  4. In a large, heavy bottomed pot, add enough oil to cover the bottom of the pot. Heat it over low-medium heat. Add the allium family members and cook until onions/ shallots are translucent or the leeks have softened.
  5. Add the ginger and orange vegetables and sauté for a few minutes, stirring frequently.
  6. Add enough stock to just cover the veggies. Add seaweed or salt. Cover with a lid, turn up the heat to high and bring to a boil. Reduce heat to medium-high and boil gently until the orange veggies are soft, stirring periodically. Add stock/ water while cooking, if needed.
  7. Remove from the heat and let cool slightly.
  8. Using a blender or hand-held mixer, puree the soup, adding orange juice one splash at a time until you reach your desired consistency and flavour.
  9. Return to the pot and re-heat. Serve hot, topped with a sprinkling of freshly ground pepper.
  10. Enjoy!

Find more delicious recipes here.

J-K Spaghetti Sauce

I’ve even had Italian guys say that this is the best spaghetti sauce that they’ve ever had (but don’t tell their Moms). It’s my adaptation of my Mom’s recipe. This sauce is one of my comfort foods. I smell it cooking and I'm transported to my childhood home. A thick sauce is great for spaghetti. For lasagna, thin the sauce with some water. While it does take a longer cooking time, it makes a big batch. And, the taste improves with time. So put some in the freezer in single-meal size containers for quick dinners on busy weeknights.

Finger-Food Version: Choose short pasta (e.g. penne) or cut long noodles into more easily-managed pieces.

Deconstructed Version: Serve plain noodles with the sauce on the side. Serve some familiar raw veggies and/or fruit with the meal.

 Spaghetti Sauce Ingredients

2 TBSP                      olive oil

1 pound                     ground bison (or extra-lean beef)

1                                onion, chopped

2 cloves                    garlic, minced

1                                chili pepper (e.g. jalapeño)

3 cups                      chopped vegetables (e.g. green or red peppers, mushrooms)

1 can (796mL)         diced tomatoes

1 can (156mL)         tomato paste

1/3 cup                     red wine

1 tsp                         sugar

2                              bay leaves

1 TBSP                   dried oregano

2 TBSP                   dried parsley

salt & pepper

Spaghetti Sauce Directions

  1. In a Dutch oven or large pot with a heavy bottom, over low-medium heat, heat the oil. Add the chopped onion. Cook the onion, stirring, until translucent.

  2. Add the minced garlic, chili pepper, and bison. Increase the heat to medium. Sauté until the bison is just turning brown, stirring frequently and breaking up any large pieces of meat.

  3. Add the vegetables and sauté for 3 – 4 minutes, stirring.

  4. Add both cans of tomatoes, wine, sugar, dried herbs, salt & pepper.

  5. Cook the sauce, uncovered, for several hours, stirring occasionally. The longer you cook the sauce, the better the flavour.

  6. Enjoy!

Check out more kid-friendly healthy recipes.

Beets: What to Do With Them

beets what to do

These versatile root veggies are one of my favourites! A classic storage, root veggie, you can find local ones throughout the winter. Beets have been making headlines lately because they may help boost exercise performance. Many kids like them because of their naturally sweet taste. However, people often wonder what the heck to do with them. So I’m sharing a couple of my favourite ways to use beets.  

Grated – Raw Beets

Beets don’t even need to be cooked. Simply wash them, peel off the outer skin, and grate them into a salad.

It doesn’t get any easier than that!

Roasted Beets

When I’m turning on the oven to cook something, I often pop a few beets in at the same time – either for a warm side-dish today, or for chilled as a salad in the future.

  1. Wash beets and cut off any long tails or furry top bits.
  2. Cut a piece of tin foil large enough to wrap the beet in. Lay it on the counter, shiny side up. Pour a dollop of olive oil in the centre.
  3. Roll the beet around in the oil to coat it. Wrap the tin foil tightly around the beet.
  4. Repeat for each beet.
  5. Place wrapped beets on a cookie tray or in a baking dish.
  6. Roast until tender, how long this takes depends on the size of the beets and the heat of your oven – at 350 degrees F it may take as long as 2 hours; at 425 degrees F it may take as short as 45 min.

Beet and Bean Borscht

From: Pulses: Cooking with Beans, Peas, Lentils and Chickpeas

This is a fantastic, hearty and tasty, full meal in one pot, vegetarian borscht (perfect for Meatless Mondays). While the recipe takes a little longer to cook, it makes a lot of soup. And, this soup tastes great re-heated. Freeze leftovers (without the yogurt or sour cream topping) in small batches.

Makes 6 Litres

  • 3 tablespoons canola oil
  • 1 large onion, chopped
  • 1 garlic clove, minced
  • 2 carrots, diced
  • 3 celery stalks
  • 3 cups green cabbage, shredded (a Cuisinart or food processor makes shredding quick work)
  • 3 cups beets, peeled and chopped
  • 10 cups vegetable stock (home-made or lower sodium)
  • 4 cups beans such as navy beans or white kidney beans (canned or cooked from dry)
  • ½ cup canned or fresh tomatoes
  • 2 tablespoons lemon juice
  • 1 teaspoon fresh cracked pepper
  • 1 bunch fresh dill (or parsley)
  • plain yogurt or sour cream

Directions

  1. In a big soup pot, sauté onion and garlic in oil until softened.
  2. Add carrots, celery and cabbage and sauté for about 3 minutes.
  3. Add beets and stock and cook for about 1 hour or until beets are slightly tender.
  4. Add beans, tomatoes, lemon juice, pepper and dill. Warm thoroughly.
  5. Serve topped with a dollop of yogurt or sour cream.
  6. Enjoy!

Click here for more healthy recipes.

Healthy Kids Snack - Banana Roll Ups

healthy kids snack banana roll ups

Sometimes the classics are a classic for a reason. Bananas and peanut butter simply taste great together. Here's a fun way to bring this classic duo together in a healthy kids snack. I'm choosing to share it today because it's easy for young hands to manage. Perfect if you're gearing up to pack snacks or a lunch for little ones with back-to-school next week. This works well with peanut butter, other nut butters (e.g. almond butter) and the non-nut butters if your child attends a nut-free facility.

Hey, it's also a delicious idea for those of us who are young at heart :)

Banana Roll-Ups Ingredients 2 small tortilla wraps, whole wheat ¾ medium banana 1 tbsp natural peanut butter, nut butter or non-nut butter ½ tsp honey (optional) 1 dash cinnamon, ground

Banana Roll-Ups Directions

  1. Slice banana.
  2. Spread nut butter or non-nut butter on wraps.
  3. Top with bananas.
  4. Drizzle honey and add a dash of cinnamon.
  5. Roll (pack in lunch boxes) and enjoy.

Get more healthy, simple, kid-friendly recipes.

Nutrition Game Changer: Cook The Night Before

cook-the-night-before

Last month I introduced the concept of nutrition game changers. Nutrition game changers are foods or simple habits that can make a big impact in your health. Some might use the term ‘nutrition hacks’. Today, I had planned to share with you a different habit. But I noticed that, with the nights cooling off again, I’ve been using this habit again. I do it a lot myself. And, it’s helped a number of clients too. I realized that this one simple habit can have a big impact on your health because it makes it easy to eat a lot of healthy foods that you might not otherwise eat. So, what’s this simple habit? Cook the night before.

Cook the Night Before

It’s a nutrition game changer for two huge reasons:

  1. It lessens the stress of getting dinner on the table.
  2. It makes it possible to eat healthy foods like whole grains, beans cooked from scratch, and longer-cooking veggies.

I’ve heard it called the witching hour. You know, that window of time between finishing work, commuting through traffic, picking the kids up from daycare, and making (and eating) dinner. For many people, it’s the most stressful time of the day. No one I know has an hour (or more) to cook dinner. Most people have somewhere from 20 – 30 minutes. Our modern lives have squished this time so much that it’s no wonder that take-out, drive-throughs, and pre-prepared food sales are through the roof. They’re survival techniques. You always ask me for help to get from survival to thriving. Cooking the night before can be a huge help.

No, I’m not talking about spending hours in the kitchen in the middle of the night! I’m talking about multi-tasking. You are likely home for several hours in the evening, after dinner but before you go to bed. Use this time to cook.

There are lots of healthy foods that take almost no work, but they take a long time to cook. Take a few minutes for prep, get the food cooking, set a timer, and then set off with your other evening activities. I personally do the prep while I’m already in the kitchen cooking my dinner for this evening. I don’t have kids so that works. If doing anything else besides preparing tonight’s dinner will take you over the edge, then do the prep later.

When the food is cooked, simply allow them to cool at room temperature and then store them in the fridge. They’ll store for several days in the fridge. On the day that you want to eat them for dinner, simply re-heat them in the microwave or steam them. (Place at least 1 inch of water in the bottom of a double boiler. Bring to a boil over high heat. Place your food in a bowl inside the double boiler. Steam until heated).

What Healthy Foods Can You Cook the Night Before?

  • Whole grains. E.g. pot barley, brown rice, wild rice, farro. They all take 45 – 60 minutes to cook. But the prep is easy. Just add them to a pot with water, bring to a boil, reduce the heat to simmer, set your timer and you’re done.
  • Winter squash. E.g. spaghetti squash, butternut, acorn squash. Preheat the oven to 425 degrees F. For all but spaghetti, cut the squash in half lengthways, scoop out the seeds. Pour a splash of water in the seed cavity. Place in a baking dish. Cover with tin foil. Bake for 45min-1 hour (until the flesh is soft when you test it with a fork). For spaghetti squash: leave the squash whole, pierce all over with a fork. Cover with tin foil. Bake for 1 hour or longer (until the squash gives easily to your touch).
  • Root veggies. E.g. beets, yams. There are lots of ways to bake these veggies. Techniques vary by veggie. But unless you take a long time to prep them by cutting them into small pieces, they’re going to take 45min – 1 hour to bake. Here’s one minimal prep time technique each for beets and yams: Preheat the oven to 425 degrees F. Wash but don’t peel the beets. Remove any stems or skinny roots. Rub with olive oil. Wrap in tin foil and place in a baking dish. Roast until soft to the touch. The time will vary based on the size of your beets. Yams can be cooked at the same temperature. Wash but don’t peel the yams. Pierce all over with a fork. Wrap in tin foil. Bake for 45min- 1 hour.
  • Dried beans. Cooking beans from dry is not only cheaper, but it avoids the exposure to BPA in the liner of most cans. Beans take 2 simple prep steps – one the morning before and one the night before. In the morning, measure out your beans, place in a bowl, cover with water (at least 1 inch above the beans), and sit at room temperature all day. At night, drain the beans,  place them in a large pot, add fresh water to cover at least 1 inch above the beans, bring to a boil, reduce the heat to simmer, set your timer and you’re done.

Extra Tip: All of these foods make fantastic whole-meal salad ingredients. Cook extra the night before and enjoy them both (cold) as a whole meal salad for your lunch and warm as a part of dinner.

Looking for new recipe ideas? Find lots of great healthy recipes here.

Banana Ice Cream (Dairy and Sugar Free)

banana ice cream

I wish that I had discovered this recipe earlier in my life. It’s creamy, smooth and delicious – just like ice cream! Banana ice cream.

While it’s vegan and sugar-free, the best thing about this recipe (besides the taste) is that it only includes 1 or 2 ingredients. How great is that!

The secret is very ripe bananas. Buy them when you see them in the store. Slice and freeze them. Then you’re ready to make ice cream anytime you wish.

Blending the bananas does take a little while. At first they will break into a chunky slurry and you will likely think that this “ice cream” idea doesn’t work. Be patient. Next it will form one big ball. Then, suddenly, it will become a beautiful, smooth, whipped texture – just like ice cream. If you haven’t added any strongly coloured flavourings, the colour of your bananas will also suddenly lighten considerably to a creamy off-white. That’s what you’re looking for – your “ice cream” is ready!

There are likely hundreds of flavor combinations. I’m sharing the plain version (so you know the base recipe) along with 3 flavour ideas. My favourite is the cinnamon.

Banana Ice Cream Directions

  1. Peel and slice bananas. Freeze.
  2. Place frozen sliced bananas in a blender. Add flavouring ingredients. Blend until smooth.

Banana Ice Cream Ingredients

Plain

1 cup              sliced bananas

Cinnamon

1 cup              sliced bananas

¼ tsp              cinnamon

Chocolate

1 cup              sliced bananas

½ - 1 tsp        cocoa

Half a teaspoon of cocoa results in a banana ice cream with just a hint of chocolate. One teaspoon gives a full chocolate flavour. Choose a level that you enjoy.

Strawberry

2/3 cup          sliced bananas

1/3 cup          strawberries

This combination works best if you partially blend the bananas first until they are just about to start creaming. Then add the strawberries. The result will be a creamy ice cream with strawberry flavour. Adding the strawberries at the same time as the bananas results in a more icy rather than creamy texture (more sorbet-like rather than ice cream-like).

Check out more healthy recipes.

Fresh Fruit Granitas

Fresh Fruit Granitas

Similar to a slushie but made with real fruit, granitas are super refreshing in the summer heat.

They’re easy to prepare. The only tricky thing is to plan ahead so that you’re home and you remember to break up the ice crystals every hour (I set the alarm on my phone to remind me).

Kids can help measure ingredients, push the buttons on the blender, and scrape the ice crystals.

The fruit flavor is strong in granitas. The recipes here are listed from the most mild to the strongest. If your little ones prefer mild flavours, stick to the melon granitas. The kiwi granita is so strong that it almost made my eyes water (which I enjoyed on a hot afternoon).

Fresh Fruit Granitas - Directions

The steps are the same for all the recipes:

  1. In a saucepan, combine sugar and water.
  2. Bring sugar water to a boil until the sugar is well dissolved.
  3. Remove from the heat and let cool for 10 minutes.
  4. In a blender, combine the fruit (removed from it’s peel and pits), fruit juice (or other liquid), and sugar water.
  5. Pour into a non-metal baking dish, such as a glass lasagna pan.
  6. Place in the freezer. Freeze for 1 hour.
  7. Remove from the freezer and scrape thoroughly with a fork, breaking up the ice crystals.
  8. Return to the freezer for 1 hour. Again, remove from the freezer and break up the ice crystals with a fork. Repeat at least 2 more times.

Fresh Fruit Granitas - Recipes

Cantaloupe

Adapted from: http://www.whiskaffair.com/2013/03/cantaloupe-lemon-and-mint-granita.html

1                      cantaloupe

1/4 cup          sugar

¼ cup             water

4 TBSP            fresh lemon juice

Raspberry-Watermelon

Adapted from: http://whipperberry.com/2013/06/raspberry-watermelon-granita.html

5 cups             cubed, de-seeded watermelon

2.5 cups          raspberries

½ cup             sugar

½ cup             cran-raspberry juice cocktail

(Combine sugar and cran-raspberry juice cocktail in saucepan.)

Pineapple-Mango

Adapted from: http://www.muybuenocookbook.com/2013/03/pineapple-and-mango-granita-blendtec-giveaway/

Juice from 2 limes

1/3 cup          sugar

1                      pineapple, peeled, cored and diced

2                      mangos, peeled, pitted, and diced

(There’s no heating the sugar in this recipe. Simply combine all ingredients in a blender.)

Kiwi

Adapted from: http://dhaleb.com/2010/03/

5                    kiwis

½ cup           sugar

½ cup           water

1 cup              club soda

2 teaspoons   lime juice

See more delicious, healthy recipes here.

4th Annual Home-made Popsicles (a.k.a. Ice Pops, Paletas)

Home-made popsicles, healthy, no sugar

I love that the healthy home-made popsicles trend is continuing (also known as ice-pops or paletas). Have you jumped on board? It's a fantastic way to enjoy some fruits and veggies. All these recipes are delicious. You won't believe that they have no sugar. Kids often love to help make them too. Here are 4 new home-made ice pop recipes for you to enjoy this summer. In case you're wondering why there are 4 recipes but only 3 in the picture, I ate all the banana-strawberry-orange ones before taking the photo :)

Home-Made Popsicles Directions

All the steps are the same for all home-made popsicles. And they're very easy:

  1. Combine ingredients in a blender.
  2. Blend until smooth.
  3. Pour into the ice-pop molds.
  4. Freeze.
  5. ENJOY!

Home-Made Popsicles Ingredients

Healthy Creamsicle

This simple 3 ingredient recipe is inspired by one of my childhood favourites – creamsicles. But unlike creamsicles, the only sugar in this recipe is that naturally found in orange juice.

  • 1 cup coconut milk
  • 1 cup orange juice
  • ½ teaspoon vanilla extract

Banana-Strawberry-Orange

Use ripe bananas and in-season, local strawberries and these are naturally sweet – no added sugar is needed.

  • 1 medium banana
  • 10 strawberries
  • ½ cup orange juice

Watermelon-Cucumber-Spinach

Don’t let the deep green colour of this recipe discourage you. It’s my favourite of the 4 recipes here – super refreshing and subtly sweet.

  • 2 cups watermelon, cubed
  • 6 large spinach leaves, thick stems removed
  • 2 inches cucumber, peeled and seeds removed
  • ½ cup coconut water

Pink Grapefruit

This recipe doesn’t need to be blended. Simply juice the grapefruits and combine with the soda water in a pitcher. Pour into the molds and freeze. If you find pink grapefruits too sour, you can substitute freshly squeezed orange juice.

  • 1 cup freshly squeezed pink grapefruits (approx 3 grapefruits)
  • 1 cup soda water

See more healthy, delicious recipes for home-made ice pops.

Baked Avocado Eggs

Baked avocado egg

I'm a long-time lover of avocados and so I'm excited to see that many others have realized how delicious they are. And, that their healthy fat is not something of which to be afraid. Browsing around Pinterest for some cooking inspiration (I love Pinterest), I found this recipe. I like to give credit where credit is due, so here's the original recipe: http://www.popsugar.com/fitness/Baked-Eggs-Avocado-Recipe-30787252 This baked avocado egg recipe has all the creamy deliciousness of an eggs benny - without all the work of Hollandaise sauce. In other words, it's a perfect recipe for Easter breakfast. Finger Food Version: Cook a few minutes longer until both the whites and yolk are set (it's recommended that babies under 12 months don't have runny egg yolks). Cut the egg and avocado into finger-food size pieces. Or, spread on long, skinny pieces of toast.

Baked Avocado Egg Ingredients:

1 avocado

2 eggs

salt & pepper

Optional: toast

Baked Avocado Egg Directions:

  1. Preheat the oven to 425 degrees.
  2. Slice the avocados in half. Remove the pit. Scoop out enough flesh from the avocado,  so the egg will fit in the centre. Reserve this flesh for another recipe/snack.
  3. Slice a small piece off the back of the avocado halves so that they will sit flat without rolling around. Place the avocados in a small baking dish, making sure they fit tightly. If your dish is too big, scrunch up a piece of tin foil to fill the space.
  4. Season the avocado halves with salt and pepper. Crack an egg into each avocado half.
  5. Place in the oven and bake for 15 to 20 minutes. Cooking time will depend on the size of your eggs and avocados. And, how you like our eggs cooked.
  6. Enjoy scooped directly out of the avocados. Or, spread on top of toast.

Check out more healthy, delicious recipes here.

Healthy Shamrock Smoothies - Green Smoothies

green smoothies

I'm a true kid of the 1980's Canadian suburbs. Growing up, we went to McDonalds a couple of times a year. One of those times each year, guarenteed, was in March. Why? If you grew up similar to me, you already know the answer...Shamrock Shakes. I totally LOVED those green, mint milkshakes that McDonalds only had on the menu around St. Patrick's Day.

To be honest, I had totally forgotten about those shakes. Those childhood days are long gone. But last Spring, while on a surf trip in California, I had a smoothie that brought it all back. It was pistachio and mint, and it was DELICIOUS! Ever since then I can't get mint or pistachios off my mind. So, of cource I had to create recipes for a healthy, minty green smoothie in time for St. Patrick's Day.

I didn't remember exactly what was in that smoothie in California. So I bought all sorts of green ingredients. And, I created a second green smoothie. Why not?!

The directions are easy. Simply combine all ingredients in a blender and blend until smooth. Adjust the amounts to suite your tastebuds. Too thick? Add more liquids. Too thin? Add more solids.

The two recipes are:

Green Smoothie Pistachio-Mint

  • 1 tablespoon flax seeds
  • 3 tablespoons pistachios
  • 3/4 cup milk (or plant-based alternative)
  • 1/3 cup plain yogurt
  • 1 cup (packed) baby spinach
  • 3 chopped dates
  • 2 tablespoons (packed) fresh mint
  • 1 teaspoon honey

Green Smoothie Avocado-Pistachio-Kale

  • 1 tablespoon flax seeds
  • 1/4 ripe avocado
  • 1/2 banana
  • 2 large kale leaves, centre ribs removed
  • 3 tablespoons pistachios
  • 1 cup milk (or plant-based alternative)

Chocolate Fruit and Nut Bark

chocolate bark_medmed

I'm frequently asked for healthy treat recipes. With Valentine's Day around the corner, I figured that today was the perfect time to share an idea for a healthy (and delicious) chocolate fruit and nut bark.

Like many of the food ideas that I share, this is more of a technique than a recipe. Pick and choose the dried fruit and nuts that you want to use. Add more or less chocolate. Once you get the hang of this you'll wonder why you've been eating cheap chocolate bars!

The healthiest options are raw (non-roasted, unsalted) nuts, unsweetened, unsulfured dried fruit, and dark chocolate with at least 70% cocoa.

Note: Chocolate does best when allowed to cool slowly. Make this the night before you want to eat it!

Chocolate Fruit and Nut Bark Ingredients

1.5 cups nuts (e.g. hazelnuts, cashews, peanuts, almonds, pistachios)

1.5 cups dried fruit (e.g. raisins, goji berries, mango, apricots)

400g chocolate (NOT semisweet baking chocolate)

Chocolate Fruit and Nut Bark Directions

  1. Chop larger fruit and nuts into bite-size pieces.
  2. Spread evenly over a parchment-lined baking sheet.
  3. Chop the chocolate.
  4. In a medium-size pot, bring 2 cups of water to a boil. Turn off the heat.
  5. Place the chopped chocolate in a large, heatproof (i.e. not plastic) bowl. Place the bowl over the boiling water. Using a spatula, stir the chocolate until it melts.
  6. Pour the chocolate over the fruit & nut mixture.
  7. Allow the bark to cool to room temperature. Then, refrigerate overnight.
  8. Cut into pieces and enjoy!

In this photo I'm testing out different fruit and nut combinations. It's a tough job but someone has to do it!

Matches made in heaven: hazelnuts and dried mango, cashews and goji berries, salted peanuts and raisins, almonds and golden raisins, pistachios and apricots.

Get more healthy recipes here.

Healthy Valentine's Day treat: Chocolate, fruit and nut bark.

Creamy Quinoa Pudding

Creamy Quinoa Pudding

This is the #1 most frequently pinned recipe from my Pinterest boards. A totally delicious update on tapioca pudding from the cookbook Quinoa 365.

This dish is fantastic for little ones who don't like to eat meat or other protein-rich foods.  If you're looking for more ways to use quinoa, I highly recommend the book. I've enjoyed many of it's recipes.

Creamy Quinoa Pudding Ingredients

1/3 cup quinoa

2/3 cup water

2 cups half and half cream

2 large eggs

1/4 cup white or cane sugar (I use less)

2 Tablespoons cornstarch

1/2 teaspoon vanilla extract

Creamy Quinoa Pudding Directions

  1. In a saucepan, bring water and quinoa to a boil. Cover, reduce to a simmer and cook for 10 minutes.
  2. Turn the heat off and leave the covered saucepan on the burner for another 6 minutes.
  3. Fluff the quinoa with a fork and allow to cool.
  4. Place the cream in a medium saucepan and heat on medium-high until hot but not boiling (steam will rise from the top). Remove from the heat.
  5. In a small bowl, whisk the eggs, sugar and cornstarch with 1 TBSP of the hot cream.
  6. Add an additional 3 TBSP of hot cream, one TBSP at a time, whisking constantly.
  7. Whisk the tempered egg mixture into the saucepan and return to medium heat. Cook, whisking constantly, until the pudding has thickened.
  8. Remove from the heat and stir in the quinoa and vanilla.
  9. Pour the pudding into individual serving bowls.
  10. Cover and refrigerate until serving time.
  11. ENJOY!

Check out more healthy recipes.

Healthy Home-Made Ice-Pops for Kids

Healthy Home-Made Ice-Pops

Recently my friends and I were having a nostalgic laugh about the rising trend of home-made ice pops – also known as paletas. The dietitian in me loves that parents are choosing to make tasty snacks for their kids that beat the heat that include real fruits (even veggies) instead of frozen, colored, sugar water. What made my friends and I giggle was remembering how we too had homemade ice pops when we were kids. However, we were raised in the suburbs in the early 80’s. Our ice pops consisted of frozen OJ concentrate, re-constituted with water, and then frozen again in the ice-pop molds. Not exactly gourmet!

Now pint-sized foodies are enjoying paletas (even the new name is fancy) made with on-trend, healthy ingredients like coconut, avocado, Greek yogurt, almond milk, even kale. And, while we were absorbing all sorts of plastic by-products, you can now buy BPA-free plastic molds and stainless steel molds. It’s amazing how far we’ve come!

Interested in making some yourself? A Google or Pinterest browse will supply you with a summer full of healthy frozen kids snack ideas. Here are two ideas to get you started. For the recipes, all the steps are the same:

  1. Combine ingredients in a blender.
  2. Blend until smooth.
  3. Pour into the paleta molds.
  4. Freeze.
  5. ENJOY!

Blueberry-Kale Home-Made Ice Pops

You really need to blend this recipe well, otherwise the kale pieces are quite big which I found unpleasant (and I love kale). The kale is never truly hidden in these, but when well-blended, it’s an enjoyable part of their texture.

1 cup frozen blueberries 1 cup kale leaves, stems removed (ideally baby kale leaves) 2 cups coconut water

Raspberry-Almond-Coconut Home-Made Ice Pops

A luscious, dairy-free recipe!

1.5 cups almond milk 1/2 cup coconut milk 1 cup fresh or frozen raspberries 2 teaspoons honey pinch of salt

Combine your favorite fruits with other healthy ingredients for a delicious and refreshing summertime paleta treat!

Get more home-made ice pop recipes here.

More Super Smoothies (for Picky Eater Kids)!

smoothies picky eater kids It happened again yesterday. I was leading a workshop and a parent asked me: “Is it wrong to give my child smoothies with veggies in them? Is this considered hiding veggies?” Rarely a workshop goes by without a parent asking me about smoothies for their picky eater kids. They’re such a popular trend these days. While I touched on this in last week’s blog post; it’s such a common question that I get about healthy snacks for kids that I thought that it was worthwhile to expand on it today. And, share some ideas for smoothie ingredients.
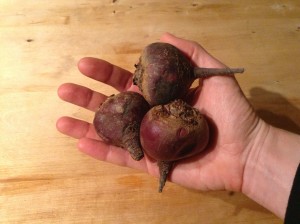
I think that smoothies are a great way to provide vegetables, fruit, protein, and healthy fats for kids. BUT there are a couple of key points to follow to be using them to role model healthy eating and support your child to try new foods on their own:

  1. Don’t lie about the ingredients. This is when you start veering into the “hiding” territory. If you’re waking up at 2am to puree foods so that your child doesn’t know that they’re in a smoothie, then you’ve strayed in the wrong direction. This doesn’t mean that you have to read out to your child a list every last ingredient in a smoothie. But don’t deny a food’s existence. Having your child help make the smoothie (like I suggested last week) is a great way for them to know what’s in it.
  2. Continue to serve “obvious” vegetables (and eat them yourself). Yes, even if your child doesn’t eat them, you’re role modeling choosing to eat vegetables. You’re teaching an important life lesson that I promise is sinking in (even if the vegetables aren’t getting eaten currently).

As I mentioned above, smoothies are a great way to provide vegetables, fruit, protein and healthy fats in a way that many picky eaters will actually eat. Here are some ingredient ideas. Note that some of the ingredients (e.g. nuts) require a higher-powered blender. Mix and match the ingredients to find combinations that you love. And don’t’ be afraid to experiment to find new favs. My new favourite is pistachio-mint-banana, which I was introduced to while on vacation in California last month!

Smoothie Ingredients - Vegetables:

  • Spinach
  • Kale
  • Avocado (also helps a smoothie be creamy)
  • Carrot (I find carrot that’s already grated to blend better than larger pieces)

Smoothie Ingredients - Fruit (choose fresh or frozen fruit instead of juice):

  • Banana (also helps a smoothie be creamy)
  • Berries of any kind
  • Peaches
  • Mango
  • Pineapple
  • Orange
  • Kiwi

Smoothie Ingredients - Protein:

  • Yogurt
  • Cashews (or cashew butter)
  • Ground almonds (or almond butter)
  • Peanut butter
  • Pistachios
  • Pumpkin seeds (or pumpkin seed butter)
  • Hemp hearts

Smoothie Ingredients - Healthy Fats:

  • See all the nut and seed ideas above (including hemp hearts)
  • Avocado
  • Flax oil (or ground flax seeds)
  • Hemp oil
  • Fish oil
  • Vitamin D drops

Other tasty ingredients (that pack more of a taste punch than a nutritional punch):

  • Dates
  • Mint
  • Cocoa powder

Looking for more ideas? Check out the recipe for my Sunshine Smoothie (Orange-Pineapple-Fresh Turmeric) or these green smoothies.

Beets: What to Do with Them

beet-recipes-dietitian-dietician-victoria-bc Aah, beets. These versatile root veggies are one of my favourites! As a dietitian, part of my job is to know how to prepare healthy foods like beets. So I’m sharing a couple of my favourite ways to use them. A classic storage, root veggie, you can find local ones (fairly cheap) throughout the winter here in Victoria, BC.

And, because of their naturally sweet taste, many kids like them.

However, people often wonder what the heck to do with them. Here are some of my favourite ways to use them.


Grated – Raw Beets

Beets don’t even need to be cooked. Simply wash them, peel off the outer skin, and grate them into a salad.

It doesn’t get any easier than that!

Grated veggies are a fantastic finger food for little ones to practice that pincer grasp.

However, be warned – beets stain! Pick up pieces from all surfaces (including the floor) quickly.

Grated, raw beets are a delicious part of my lentil-farro power bowl (full meal salad).


Roasted Beets

When I’m turning on the oven to cook something, I often pop a few beets in at the same time – either for a warm side-dish today, or for chilled as a salad in the future.

  1. Wash beets and cut off any long tails or furry top bits.
  2. Cut a piece of tin foil large enough to wrap the beet in. Lay it on the counter, shiny side up. Pour a dollop of olive oil in the centre.
  3. Roll the beet around in the oil to coat it. Wrap the tin foil tightly around the beet.
  4. Repeat for each beet.
  5. Place wrapped beets on a cookie tray or in a baking dish.
  6. Roast until tender, how long this takes depends on the size of the beets and the heat of your oven – at 350 degrees F it may take as long as 2 hours; at 425 degrees F it may take as short as 45 min.


Beet and Bean Borscht

Check out this fantastic hearty and tasty full meal in one pot, vegetarian borscht here. While the recipe takes a little longer to cook, it makes a lot of soup. And, this soup tastes great re-heated. Freeze leftovers (without the yogurt or sour cream topping) in small batches. I wanted to share it not only because it’s so tasty, but because it’s handy to have healthy meals like this in the freezer when the busy holiday season starts up.

Beans, beets and cabbage are all super healthy (and inexpensive) that I’m always looking for new recipes. I picked up this little pamphlet at the Saskatchewan pavilion at the 2010 Olympics. Did you know that we grow tons of beans, split peas and lentils here in Canada?

If the mixed textures in this soup are too advanced for your little one, simply take beans and pieces of the veggies out of the soup and place them in your little one’s dish/ on their tray.